Showing posts with label DIY embellishments. Show all posts

Tuesday, July 19, 2011

My Charmer

This pic of my son was taken on holiday in the Drakensberg. We went for a hike and found this amasing waterfall. Jarrod climbed high up on the rocks and I managed to get some great shots of him with the water gushing down in the background. I used one of my favourite collections from Bo Bunny, the Mamma Paparazi. I love the colour combinations of this line. This was also featured in the June issue of SNR.
I used some scraps of the same collection to make this paper flower using the TH Tattered florals die. I added some floral wire which I wrapped in floral tape and painted with some creative inspiration paints. I wrapped it around a paint brush handle to create some twirls.

I added some acrylic ink to some brads which I then used to lace some ribbons around. I wanted to use my paper die that's part of the collection is a slighted unconventional way so I cut it up and placed it at opposite ends of the page tieing it together with the lacing.

I embossed my chipboard title letters with some brass UTEE. I used a combination of black and brass UTEE to emboss a script stamp too on apposing corners below.

This paper is so gorgeous and the textures in the papers are so stgriking that I wanted to keep the design simple and not clutter the layout with too many embellishments like I sometime tend to do.
TFL.

Monday, July 18, 2011

Band Rock

This is my daughter playing with her toy guitar. I've had these pic in my picture box for over a year now. When I saw the call for "Family Fun Nights"over at SNR, I knew immediately that I'd use these pics. I don't usually do multi pictured layouts so this was areal challenge for me. At first I tried getting clever with the design but eventually I decided to keep it simple and placed the pics side by side. The pics are so adorable that I knew that needed to be the focus.
I used a lot of distressing on this LO and then layered the papers. I made a simple flower cluster using a homemade flower and some iamroses flowers. I also stamped out some paper leaves using my Heartfelt Creations stamp which I coloured with some distress inks.
I used this Dusty Attic Vine to border the top of the page. I used some gold acrylic ink and red and black Creative Inspiration paints.
I used some black stickles to highlight the title letters on the patterned papers I used.

Once I was finished with this LO I stepped back and was quite happy with the end result. I'm still not crazy about working with multiple pictures but this was great fun and refreshing break away from my usual designs.

Sunday, July 17, 2011

Angelic Little Boy

This is a LO I did for the June issue of SNR. This was done for the Scrap Your Stash call. Junes theme was eyelets and brads. I used some eyelets to do some lacing using ribbon. I really love this picture of my youngest son. I can't believe I managed to capture that look on his face. I used several techniques on this layout which have become firm favourites which I use more and more regularly.

I wanted to make the arch which is part of this gorgeous Bo Bunny Time Piece collection the centre of attention for my layout. One of my favourite products is polymer clay. I used some white polymer clay to make the vine and leaves which I coloured with some Perfect Pearls. I used green patina for the leaves and antique gold for the vine. I then formed an arch around the arch in the pp. Note: A helpful tip for making the leaves is to use a cutter that can be purchased from your local baking supply store. My cutter has a built in plunger that adds the veins to the leaves.

I used some tissue paper and gel medium for the window of the arch which I then painted with some gold acrylic ink to create texture
To fill the right side of the page I created this zipper like design. I tore a "v"into the paper and then laced some gold and burgandy organza ribbon together using eyelets.

I used some of this gorgeous Prima trim to finish off the "zipper" look. I also made some homemade mist using Aged Mahogany reinker and a tiny amount of white Perfect Pearls in a mini mister. I used this mist on the mini rose buds I placed around the arch. The flocked rub-ons in the corners are also from Prima. I absolutely love these.

Sunday, May 22, 2011

~Tough Guy~

This is a pic of my son taken for a fancy dress. The theme was "rock stars" and my DS went as Robbie Williams. I love his pose in this pic, my pretty boy trying sooo hard to look mean...LOL!!

I did this LO for the grunge call for the April issue of SNR. I used a combination of inks, metal and pastes to obtain the grunge look.


For the title I used some Ten Seconds Studio metal which I turned over onto the wrong side and wrote each word backwards using a defining tool. I also made a border using the same tool drawing squiggles. I then turned the piece right side over and sanded the raised edges.
I ran another piece of metel through my cuttlebug to create some texture and sanded the raised edges down. I then tore the metal leaving jagged edges.

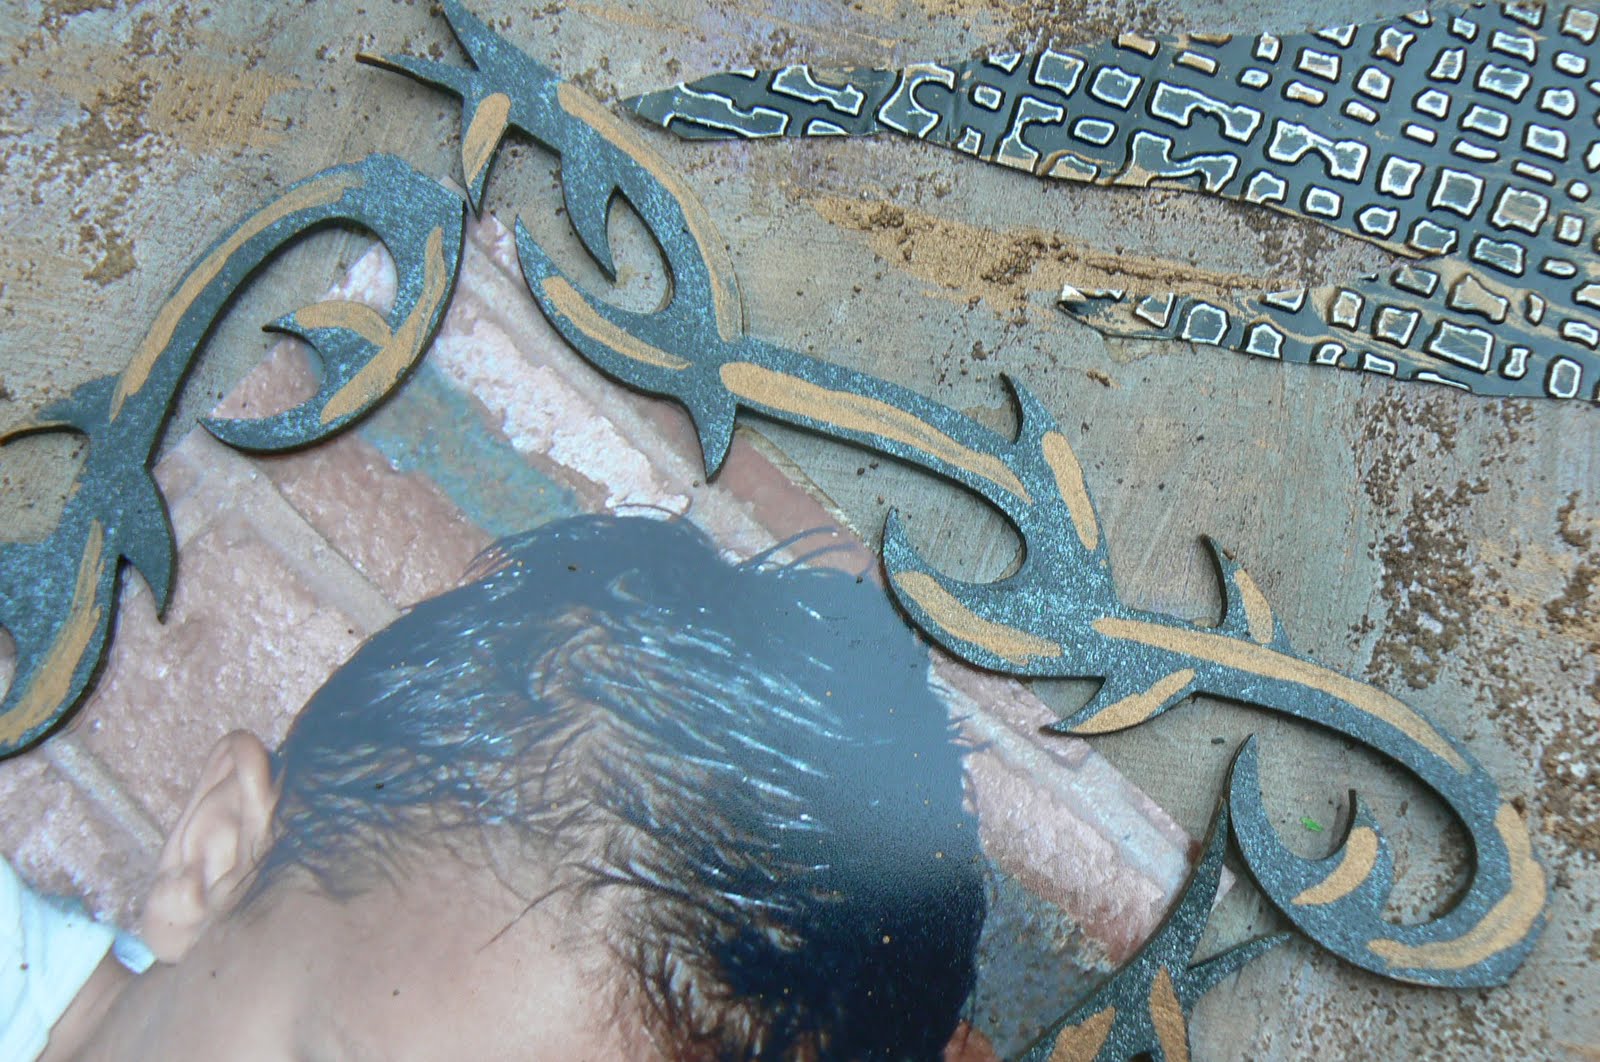
I took a tribal Dusty Attic chipboard piece and cut it in half. I painted it with some black and gold Liquirex acrylic ink and then used the 2 pieces to round a corner of the photo. I also used the Dusty Attic brick wall as part of my background which was painted with the same acrylic ink.

To finish off I made the grungy version of the Prima Deschire bloom which I will be posting a tutorial for shortly. As a last minute addition I added some Golden pumice gel which I painted with some metallic acrylic ink once it had dried.
TFL

Sunday, February 13, 2011

~Little Miss Attitude~

This was the layout I did for the SNR January Colour Inspiration call. These calls are exclusive to the SNR staffers and can be great fun. We are given 3 inspiration pieces and 2 colour palettes to choose from. Once you've made your selection then you have to use these to create a layout or card.

This is the inspiration piece and colour palette I selected. I was not only drawn to the design of the inspiration piece but also to the elements in the piece. I knew I could use my ballerina bloom tutorial to represent the fluffy flower in the bottom left picture. I also had a beautiful Dusty Attic chandelier piece I could use to represent the light fitting in the inspiration piece. I combined the lace and the ruffles of the cake icing to make the ruffled lace at the bottom of the photo.
I decided to use the design of the inspiration piece as my bg design. I used white cardstock which I then inked with various combinations of distress inks. I used aged mahogany, scattered straw, worn lipstick, walnut stain. I placed the photo in the centre of the design to put my own spin on the inspiration piece design as I did not want to duplicate it exactly.

These calls can be great fun and I hope you check back next month for the February piece which is my all time favourite of the ones I've done so far.
If you're a SNR subscriber then check it out in the mag on the 17th when the Feb issue is published.  

~Rock Star~

This layout was done for the SNR monochromatic call. The colour was red obviously, but what makes the SNR monochromatic calls more of a challenge than any other monochromatic challenge I've ever come across is that we were only allowed to use various shades of red, NO NEUTRALS were allowed.
This made everything that much more difficult.

I decided to approached the challenge from a different angle. If I couldn't use colour to add interest to my layout then I'd use various textures instead.
I first painted my red cs with some red acrylic paint which I them sprinkled with some very fine glitter while it was still wet. Once that dried I added a piece of red corrugated board which I framed with red string beads. I used a piece of embossed metal sheeting to frame my photo. I coloured the metal with some raisin alcohol ink (the metal is much redder IRL). I also handcut some metal flowers which were also coloured with some raisin alcohol ink and layered with some painted Prima blooms and red pearls.
To finish off I coloured some rhinestone alphas with alcohol ink for my title lettering.

Even though this is not one of my favourite layouts I've ever done, I was excited to have met the criteria of the challenge and produced an interesting layout if nothing else.

Thursday, January 13, 2011

~ Christmas Cheer~


This is the LO I did for the December issue of SNR's color inspiration. Wow was that a challenge for me. First off, my mojo was nowhere to be seen. I think it paniced and ran away when I got the news that I had been asked to join the staff at SNR...LOL! Anyways, I had made a commitment to do a piece so I was determined to get the job done, mojo or not!!!
The task set before us was to select one inspiration piece and 1 colour palett and create a LO using those as your guide. My inspration piece was this lovely vintage picture

And my colour palette was

I loved the negative space aspect of the picture and immediately had the idea of replacing the butterflies with some Christmas baubles.  These I first painted with some Shimmerz paint then embossed with some clear UTEE and added some stickles to the edges and had them hanging down the papper from some silver ribbon.
I also wanted my picture to look like Christmas decor so I cut a round frame from some gold cardstock and added some handmade poinsettias I made using my good friend Amarilys pointsettia tutorial. These are super easy to make and the best part is that you can colour coordinate your flowers to your LO.


~ Santa's Helpers ~


This is a LO I did for a call over at SNR. I had just started as a staffer there and the deadline for calls was a few days away  and my mojo had left the buliding!!! Needless to say,  I paniced a little....LOL! I had started working on this Christmas LO about 18 months ago but wasn't happy with it so it was packed away in my cupboard gathering dust. Because of the time restrainst, I decided I would see if I could bring it back to life. The original had petaloo poinsettias's on which I wasn't so crazy about since I've recently developed a passion to making my own embellishments so I whipped those off the page and replaced them with these great handmade ones I made using the very talented and my good friend Amarilys Poinsettia tutorial

I added a little water distressing to the corners, threw in some bling and we were good to go. It's still not a favourite LO of mine but i was happy enough with it to submit it. I can promise you one thing though, next year's Christmas layouts are going to be a hell of a lot better....LOL!

Sunday, December 26, 2010

Joy to the world - Swirlydoos

 
This is the first LO I made using my swirlydoos December kit. Krissy really did a fantastic job putting this kit together. It's my first swirly's kit and I'm absolutely delighted with my decision to sign up. I used the Bo Bunny range of pp's from the kit. I also made it for the Christmas LO with a regular pic challenge. The pic is of my youngest son Matt when he was about 6 months old.

I used this gorgeous vine from my stash that I bought from my dear friend Katie's etsy shop. I've been holding onto it for a Christmas LO. I just love all the bling she assed to this vine
I layered some pointsettia petals which I bought from iamroses.com. I misted them with some perfect pearls and some aged mahogany ink to get the right sde of red. The leaves were made from some clay which I painted green and sprinkled with some fairy glitter.


I cut this title lock from some of the pp in the kit and coated it with some clear UTEE which I then cracked when it was dry amd added some pearls and rhinestones.

Monday, November 22, 2010

~Baby Girl~

 
This is a picture of my DD Erin taken on Mothers Day this year. I just love her in red. Like most little girls she's usually in Pink from head to toe but occasionally she'll wear another colour and it's such a treat!!
This is a lift of one of my favourite artists Robin whose work I've always admired. All the embellishments have been handmade on this LO

I used the ribbon rose tutorial for this months ribbon and fabric twist for the DIY challenge I host over at sb.com. These are really quick and easy to make and although it may be tricky to get them started in the beginning, they super easy once you get the hang of it. I then placed the ribbon roses into a layered flower I made using black satin and chiffon.
I made some more of the brilliant Lisa Gregory's ribbon rose bud vines using red and black satin ribbon. I painted over the green floral tape with some Onyx Creative Imaginations paint. These paints are sooo gorgeous and the colours are beautiful and rich. The paints are also a lot thicker than shimmerz and really add a lovely finished touch to a project.
For the 3rd set of flowers I just twisted some strips of black chiffon around and the made coils with the twisted strips and then added some paper roses on top of those. I then layered the coiled blooms onto some red organza ribbon I had in my stash 
I then took some black UTEE and mixed in a little white perfect pearls which I them embossed these butterflies and the title chipboard lettering with. It has a beautiful shimmer to it IRL and a great way to revive some old dated chipboard pieces you may have in your stash.

I then thought it would be fun to play around with some modeling paste and made some distressed paper edges by randomly applying some paste and then brushing it out using a very small paint brush. I added some red acrylic paint to the paste before applying to the paper. I then randomly painted some onyx creative inspiration paint over the dried paste.

Tuesday, October 19, 2010

~ The Woodland Fairy ~


This is my DD Erin posing in the garden for her plant crazy dad....LOL! My DH is as passionate about our garden as I am about scrapbooking so everytime a new flower comes into bloom he has one of the kids pose for a pic around the flower. He's come up with an idea to make a calendar with all the pics he's collected which I think is a marvelous way for us to combine our hobbies. But for now I just used the pic to create this LO which was made for several challenges.

The first being the October DIY contest over at swirlydoos. As the host of the DIY challenge over at sb.com this challenge was just screaming out to me to join. The prize on offer is also fab (8 smooch spitz worth $36) so I just had to give it a bash. This is also my entry for the monochromatic and no pp's challenges over at sb.com.
Last but not least I also made this LO as an example LO for the October DIY challenge using all 3 twist options in the respective categories.

I used the same technique as in my "a rare moment" LO using only white cardstock, UTEE and distress ink to create all the bg pp's. This time I first embossed the white cardstock with some clear UTEE using my large elegant script stamps from Heartfelt creations. I then inked over the embossed image with some spiced marmalade distress ink. As you can see the white cardstock shines through the clear UTEE......cool, hey!
I used walnut stain distress ink for the layer between the orange pp's and water distressed the top 2 layers. I made a short tutorial for this technique if you want to check it out
The twist for the paper embellishment category for the DIY challenge was these marvelous Mountain Lilies By Amarilys. They are so pretty and Amarilys has done a easy to follow step-by-step tutorial. I used 3 cream coloured beads as my center.
 The twist for the ribbon/fabric category was these Ribbon Rose Buds by Lisa Gregory which is now one of my favourite tutorials.................what's not to love. I made these using 15mm ribbon. I then added some floral wire spirals to create a mini vine. The floral tape was a rather bright lime green so I used some chocolate shimmerz paint to cover the tape.
I had some cream coloured lace in my stash which I first randomly painted with some orange craft paint. Once that had dried I used some tattered leather glimmer mist. IRL you can see the specks of orange a lot clearer than you can in this pic.
Dusty Attic is fast becoming one of my favourite chipboard brands. The details on their pieces are just exsquisite. I used the Lamp post #4 (DA0152) for this project. I first embossed the chippie with some walnut stain distress embossing powder and inked over it. I then spiraled some mini rose buds I found at a local craft store around the lamp post and added some mini leaves from my Swirly Leafs stamp set from heartfelt creations.

TFL, hope you enjoy all the tuts as much as I did.

Monday, September 27, 2010

~ A rare moment ~ UTEE

 
This is a pic taken of my oldest 2 while we were on vacation in hluhluwe (national Game reserve in SA). The 2 of them were walking up ahead of us while on a hike and I thought they looked so sweet holding hands. Like with so many siblings,  it's such a rare and precious moment to see them getting along that I just HAD to capture it on film. Unfortunately I just couldn't think of a suitable title so I've left the LO untitled until I think of something......suggestions welcome.

I made a quick visit to my LSS the other day to pick up some cardstock and stumbled upon this FABULOUS product called UTEE (Ultra Thick Embossing Enamel). They only stock the Ranger brand and the owner had a few sample pieces out using various techniques and I instantly fell inlove. So I walked in to buy a few pieces of carstock and walked out spending a small fortune on a couple of tubs of this wonderful product...LOL!! But definitely worth every cent!!

Believe it or not, I only used 2 pieces of plain white cardstock for this LO.......NO PRINTED PAPERS!!!

For the background paper I first distressed the edges of the white cardstock with my TH paper distresser. I then used some Black UTEE together with my Large Elegant Word Stamp from Heartfelt creations. For the actual words I only used one layer of UTEE but for the distressed corners I randomly applied some embossing ink to the corners, sprinkled the UTEE, dusted excess off and then heated. I repeated this process 3 times until I had achieved the end look I wanted. Once I completed the embossing, I inked the bg using walnut stain distress ink.


To finish off the bg paper I water distressed opposite corners. For this particular project I used a paintbrush to wet the BACK SIDE of the carstock as to not spoil the inked side. Once the cs was wet enough to manipulate I pinched and scrunched the paper until I achieved the look I wanted. A helpful tip is to use a heating tool to dry the paper as you go along so it keeps the shape you've moulded.
For the center "frame" I cut the shape from another piece of white cs, distressed the edges, inked the cs using black soot and walnut stain distress inks. I then water distressed all four sides. Once that had dried I began applying the UTEE. You follow the same steps as with other embossing powder, i.e. apply embossing ink, add embossing powder, remove excess powder back into container and heat. I repeated this process 3 times until I had a nice THICK layer of UTEE which I then stamped into with the same stamp on the bg cs while still hot. The UTEE cools quickly so you need to do this fast. The best thing about this product is that you can reheat it over and over if you make a mistake.
I used some Black UTEE on the Dusty Attic piece. Again I did about 2 layers for this then just lightly painted over it with some gold liquid pearl using my finger.
Here's also a close up of the stamped UTEE letters. You can hopefully see how the stamped bits are raised and look plastic like. It's really lovely IRL

Again I made some of Lisa Gregory's Ribbon Rose Buds which I'm just loving. This time I used plain satin ribbon and I really love the finished look of these. Because I only had green floral tape I painted the floral tape using some Chocolat Shimmerz paints (another favourite product brand). The cardstock leaves behind the vine are made using my Leafy Swirls Stamp from Heartfelt creations (they have some FANTASTIC stamps!!!) A big thank you to both Lisa Valentine and Lisa Gregory for pointing me in their direction.
I made another Distressed Camelot Rose using a tutorial I've featured previously in my DIY challenge. These are really great and very easy to make. Still a favourite for me.

TFL