This technique is an interesting way to add some texture to your layouts and is a great way of easing into mixed media. Many scrapbook artists may be wary of adding pastes directly to their projects. Following this technique, you get the texture without the risk of compromising your layout.
An important point to remember before starting this project is that molding paste is a slow drying product which could take up to 24 hours to dry depending on how thick you apply your paste so please factor this into your project planning.

Supplies
Triplex board or chipboard
Molding paste
Cling wrap
Trowel
Choice of Paint, Perfect Pearls or alcohol ink

Step One: Gather your supplies together. Cut your piece of triplex board or chipboard into a frame shape. The center of your frame should be the exact size of your photograph you plan to frame.

Step Two: Using a trowel and working on your non-stick craft mat add some molding paste to your frame. At this point you should just cover the surface area of the frame with a thin layer about 2mm thick. Don't be too concerned about creating patterns at this point. Remember, it's a slow drying product so you have plenty of time to work on creating the patterns.
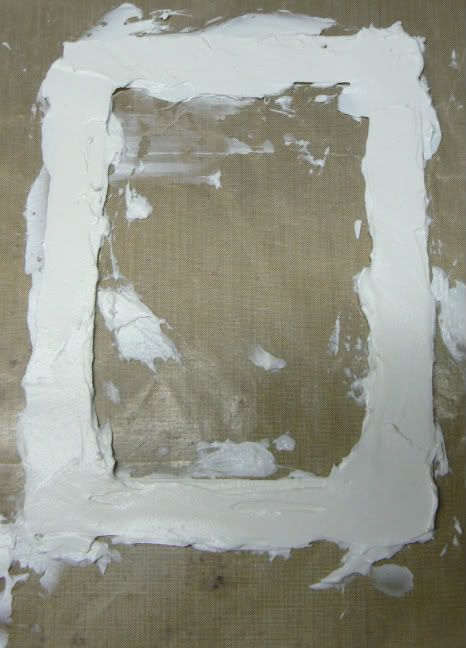
Step Three: Once the entire surface area of the frame is covered you can start playing around with creating your texture. You can use your trowel to create some dips and peaks but I find the best results are achieved by using your fingers. At this point you have 2 options....
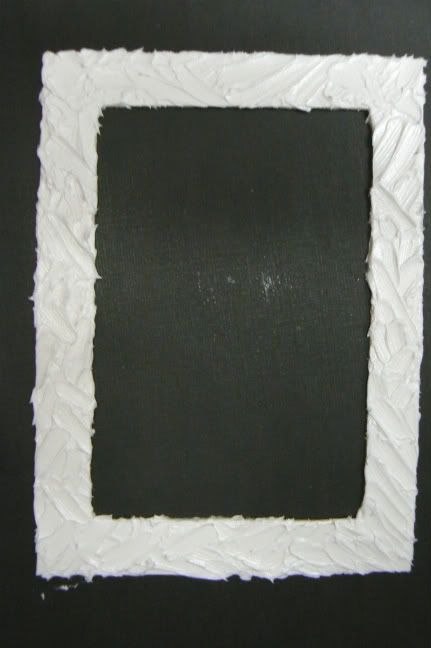
Step Four (option 1): You can create a neat textured surface only covering the actual frame, or...
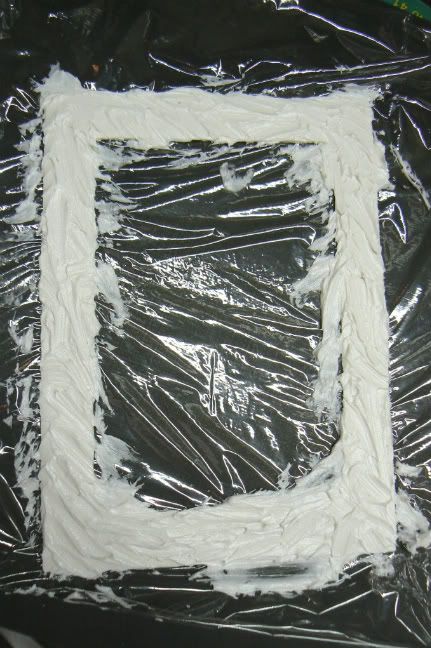
Step Four (option 2): You can get a little messy with it by placing the frame onto a piece of a cling wrap and allow the paste to flow off the frame. It may look really messy but there's no need to be concerned, the end result is fabulous, I promise. Put your frame aside in a safe place to dry. My particular frame took 24 hours to dry.
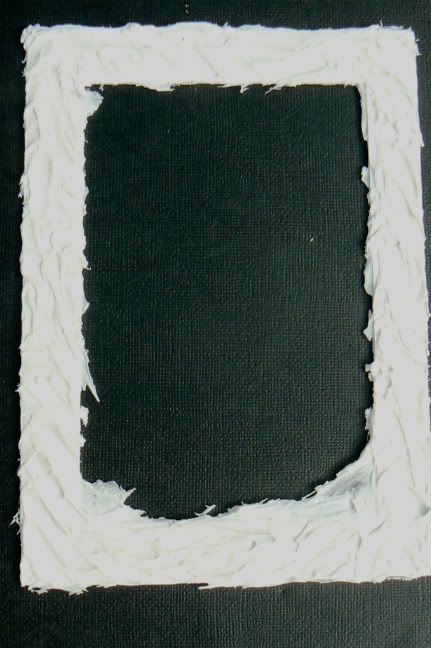
Step Five: Once the molding paste is dry, carefully peel the cling wrap off. As you can see in my example, there is still molding paste filling out the corners, thus softening the angles of the frame. Some pieces of the paste are so thin and delicate they're almost translucent so be very careful when taking the cling wrap off.

Step Six: The molding paste dries with a matt finish so this is where you get to have some fun adding some sparkle to and characeter to your project. For my layout I needed a plain white frame so I painted the frame with some white perfect pearls. This is a real stunning finish IRL. However, I wanted to showcase something with more colour for the tutorial so I've taken a second frame and played with some color options to show what works and what doesn't
(please add bullet points)
Top left: Several colours of perfect pearls blended together. Absolutely gorgeous finish which I highly recommend you try. the mica powders blend together beautifully on this textured surface.
Top right: Alcohol ink - I used a mixture of raisin and gold mixative. This creates a gorgeous metallic finish.
Bottom left: Pearlised paint - I used the color amethyst from Creative Inspirations. This has a beautiful pearlised finish.
Bottom right: Glimmer mist - The molding paste seems to absorb the mist, leaving a dull surface when it dries. This would be an option if you're wanting to retain the matt finish with a little added colour.
These are just some examples of what you could use to colour your paste with but feel free to play with other colour mediums like acrylic paint, distress inks, stickles for example.
I would suggest you make a sample chart by applying several small amounts of molding paste onto a piece of cardstock and then colour them with various colour mediums you may want to use. Once your samples have dried you will have a better idea of what it will look like. There may be some unexpected surprises. I was certainly surprised by how the glimmer mist turned out because I assumed it would dry shimmery and gorgeous but was rather let down.
what a fun technique!
ReplyDeleteI'm new to using the perfect pearls, so I was wondering if you used them wet or dry?
ReplyDeleteThanks!