Showing posts with label SNR. Show all posts

Wednesday, June 20, 2012

Mixed Media Canvas/layout

It's been a while since I've been online due to having to deal with some urgent personal issues but I've really missed crafting and interacting with all the fab crafty ladies online so I've made a commitment to get back into the swing of things as soon as possible. I thought I'd get the ball rolling by posting a LO I did a while back but never got around to posting.
It's one of my favourites for several reasons. Firstly, it was one of my first attempts of combining mixed media canvas work techniques with scrapbooking and secondly, I absolutely adore this picture of my DD and teal/turquoise are some of my favourite colours.
To start I first covered the entire canvas with some gesso beceause at that point I wasn't quite sure which direction I was headed so I wanted a good foundation to work on no matter what. I then misted some Pink Paislee mistable pp's with some of the divine Lindy's Stamp Gang starburst sprays. I placed the misted pp in the centre of the canvas so that it could be used as a solid background for my photograph. I then really got my hands dirty and had a blast adding some textured molding paste to the canvas forming a border around the misted pp. I used my finger to create some swirls in the paste along the right border and then used a palett knife to tap the paste to create that really fantastic looking textured finish at the bottom of the canvas. I wanted to try something completely new and unique so I dug out some glass chips I had used for a one of my kids school projects and did a glass mosaic type  finish along the left and top of the canvas. I did this by first adding a thick layer of molding paste to the canvas which I then embedded the glass chips into. I didn't want the traditional smoothed out finish you would normally do with mosaics so I left areas unfilled between the glass chips for a more distresed finish.
Once the paste had dried I coloured between the glass chips using several colours of LSG mists, starburst mixed with gel medium to create a paint and just went to town....!!!! This really was one of the most fun projects I've worked on.


After my background and canvas base was completely coloured and had dried I added my pic and some embellishments. I used the same LSG mists and paints to alter the iamroses flowers as well as this mini tag I made by adding wrinkled tissue paper to a normal mail tag with some gel medium. I then embellished the tag with some gems. I also coloured the lace and white photo corners with the LSG paint. I finished my project off by adding some gorgeous Prima flourishes.
I intend on trying a few more of these type projects in the near future because they're great fun to work on and it's a perfect opportunity to try new things you can't always get away with on paper bases.

Thanks for stopping by.........


Saturday, April 14, 2012

Tutorial - Creating Backgrounds using UTEE

Let me tell you, UTEE is far more than just an embossing powder. This is one amazing product and definitely one of my all-time favourites under the Ranger umbrella. The versatility of this single product is actually mind blowing. You can use it for regular embossing or to make incredible embellishments using the melting pot. As much as I love all of that I'd like to share my personal favourite techniques using this product which is creating backgrounds. I have three effects I'd like to share with you, two of which don't require a melting pot so sit back and enjoy.
 Supplies
UTEE in several colours
Heat gun
Melting pot
Cardstock or triplex board
Toothpick

 Marble Background

 Step One: For my demonstrations I'm using an ATC size background base on some recycled cereal boxes cut down to size. Apply embossing ink to the entire surface area, add UTEE powder and emboss using the black UTEE with your heat gun. Using the black UTEE as a base provides a great contrast against the metallic colours I'll be adding. You will need to repeat this step 3 times for a nice thick and solid base.
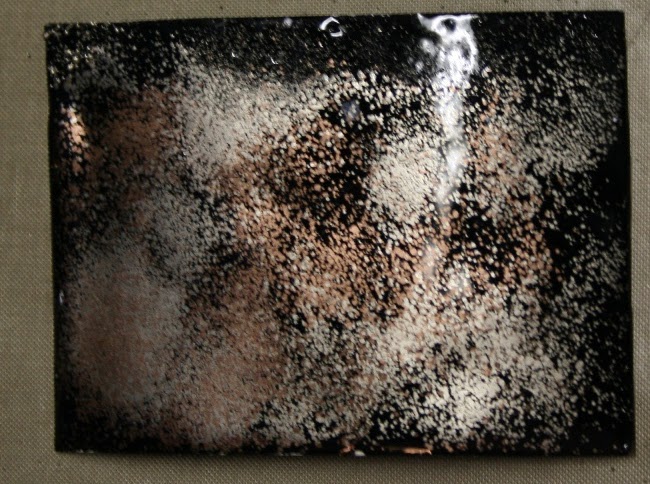
Step Two: While your black UTEE is still hot start adding some of your first metallic UTEE which is the platinum in my sample. You need to only add a very little in small areas around your base. You'll notice that the UTEE starts melting almost instantly. Use your heat gun to melt any powder left.
Step Three: Using a toothpick while the embossing powder is hot and almost liquid like on your base start swirling it around mixing the metallic powder with the black creating a marble like effect. If you feel it starting to harden then just zap it with the heat gun again long enough for it to melt again.
 Step Four: You can leave your project as is or you can add a second metallic colour to the mix as I did using the bronze UTEE powder. Again swirl the melted bronze powder around with the toothpick creating a multi toned marble effect....isn't this just gorgeous?
A practical use for this technique would be to alter some chipboard lettering or shapes. This would make a perfect accent to a layout and just look at how delicious that marble effect looks.

 Drizzled Background

 Step One: For this technique you will need a melting pot and three or four different colours of UTEE. You can use whichever colours you like according to your own personal taste. Melt just a little of your first colour in your melting pot and once it's completely melted drizzle it onto your non-stick craft mat in a random pattern as shown above.

Step Two: If you have project pan then you can go ahead and use a new pan or simple clean out your pot and add the second colour UTEE. Again let it completely melt and then drizzle that over the first layer.
Step Three: I added a layer of black in between steps and then as my final layer used some of the pearl UTEE. Again melt your UTEE and drizzle over the previous layers.

Step Four: Once the UTEE is completely dry, which only takes a few seconds, you can lift your drizzle sheet from your craft mat and add it to your background base. If you're using it on a ATC, card or tag then just cut down all the excess bits. You can attach it to your base using some gel medium or a glue that will dry clear.
 I made my pattern quite condensed but you can obviously spread it out more for a less bulky effect.

Peaks and Valleys background
Step One: For this technique you'll need to start with a black base as we did for the first technique. Three layers will provide a nice thick and solid foundation.
Step Two: Now add two more colours to the base while the Black UTEE is still hot. Use your heat gun to melt any excess powder.
Step Three: Now for the fun part, using your heat gun very close to your project surface and at various angles start blowing the melted UTEE around so that peaks begin to form. If you use the metallic powders you will notice how patterns start to form in the direction that you blow the melted UTEE.

Step Four: Continue doing this until you have created the pattern you like. It's difficult to show the peaks and valleys in a picture but if you run your finger across your project surface it will definitely feel the uneven surface and the patterns make for a gorgeous finish.
 These are just three of my favourite background technique using UTEE. Each has a unique finish and can be adapted to whatever project you decide to use it on. Chipboard and ATC's deliver some of the best results. The Drizzle technique is perfect for a layout background too. Mix and match your colours and above all, have fun.
Here's a layout I did using these techniques on the DA Rustic Frame Set

Monday, March 5, 2012

Tutorial - Grunging up Darjeeling


 The Petaloo Darjeeling collection is made up of some amazing warm colours and unique styles definitely makes them one of my all-time favourite collections. The flower style and colours already lend themselves to a soft grungy look and with just a little extra help you can transform them into something really grungy, perfect for a masculine project. The technique I'm sharing with you will also help put those box loads of eyelets I'm sure every paper crafter has hidden in the bottom of their stash somewhere to good use.

Supplies
Darjeeling Flower
Eyelets
Eyelet tool
Metal flower centre
Step One: Select your flower. Ideally you want a flower that has wide petals so that you have a good surface to work on and can add several eyelets to a single petal.

Step Two: Using your eyelet tool punch your holes for your eyelets. You want to punch the holes far enough away from the petal edges that the petals don't tear. Make sure that your holes are spaced wide enough apart so that the eyelets won't overlap when you add them.
Step Three: Now add the eyelets to the petals and close them off at the back. Work carefully when doing this so that you don't tear your petals. You can now ink the petals with some walnut stain distress ink to add a little more definition if you like. I also chose to remove the clay flower centre and replace it with a metal and pearl one.

This is the Layout I used my newly altered grungy flower on.
I chose to use eyelets in the same shade as my flower but these look just as good if you add some brass or copper eyelets. You could also spice it up a bit by colouring your eyelets with some alcohol ink first. Whatever your taste, once you try this I'm confident that eyelets will go right back onto your shopping list.

Here is another layout I did using the Darjeeling collection on to create a Grungy Feminine layout. I did not use the eyelet technique on these but instead coated them with some gel medium which gives the flowers a leathery appearance once it dries. The gel medium also stiffens the petals which makes it easier to manipulate them to create a fuller looking flower.
On this layout, using the Darjeeling collection once again, I added the gel medium to the blue flowers and removed the flower centre it came with and replaced them with some vintage brads. I also used some of the Petaloo Color me crazy flowers on this which I inked brown with some distress ink.

These truly are some of my favourite flowers and I just love that you can add them to regular shabby chic styled layout or you can be a little adventurous and grunge them up a little and then use them against a corrugated board background as I have done with my three layouts for a completely different look.  
TFL

Monday, October 17, 2011

Tutorial - Newspaper Letters


Most households worldwide have a pile of newspapers piled up somewhere. These have been put to good use by crafters for a very long time making larger projects like paper mache or simpler altered items. Today I want to downscale even more and show you how to transform a simple item like a chipboard letter into something special to add to your paper crafting project. This was a tutorial featured in the August copy of Scarpbook News and Review magazine

Supplies
Chipboard letters
Newspaper
Ink
Paint
Gel Medium
Step One: Tear a piece of newspaper up into small pieces as shown above. Try and find a piece of newspaper that has text on both sides of the paper.
Step Two: Paste the newspaper onto the chipboard letter. Place the newspaper pieces onto the letter in a random pattern with the text running in various directions.
Step Three: Turn the chipboard letter over and add some adhesive to the sides. Fold the newspaper over the sides and cut away any excess pieces.
Step Four: Turn the Chipboard letter right side up again and lightly sand the edges with a sanding block to smooth them.
Step Five A: You have several options to finish your letters off. The first and easiest option is to ink the edges. You could ink them lightly or heavily as I have done for a more dramatic look.
Step Five B.1: Another option is to first ink the edges and then add some acrylic paint to your letter. In keeping with the recycling theme, use items like toilet paper rolls to stamp onto your letters.
Step Five B.2: For a more distressed painted finish add a layer of Ranger Rock Candy crackle paint.
Step Five C.1: Another option to finish off your letters is to age your letters for a vintage look. Start by inking your newspaper covered letter with some Ranger Vintage photo distress ink. Then ink the edges with some Walnut Stain distress ink.
Step Five C.2: Now add a layer of extra thick gel medium to the entire surface of your letter. For added texture you could tap your finger on the gel to create some peaks. Set aside to dry.
Step Five C.3: Once the gel medium has dried completely you can add some more ink and perhaps some metallic paints to the letter for a really aged finish. The gel medium on the letter above was smoothed over before it dried.
Step Five C.4: For the letter above I created a far more textured surface with the gel medium but tapping it with my finger. This is a really lovely finish and definitely my personal favourite of the options I’ve demonstrated.

Depending on your personal style, there are dozens of options to finish your letters. You could dip your covered letters into some clear UTEE, stamp and emboss over the newspaper text or maybe even mist them. Not only is this a fun technique to use to embellish your chipboard lettering but also a great way of keeping up with the latest trend of scripted text on papers without having to fork out a lot of money.

Sunday, October 16, 2011

Tutorial - Sticker Letter Background

One of my major frustrations with paper crafting is those annoying leftover sticker letters you inevitably end up with. I have yet to use every single letter in a sheet of alpha stickers. I know one option is to combine your lettering when making a title, which I often do, but I’d like to show you another more fun and creative use for those leftovers. This was a tutorial featured in the August copy of Scrapbook News and Review magazine

Supplies
Alpha and/or numeric sticker letters
Cardstock
Gesso
Mists

Step One: Cut a piece cardstock to the size you need. I’m going to use mine as a background on a card but you could cover an entire 12x12 piece of cardstock for a layout if you choose.
Step Two: Stick your alpha and/or numerical stickers onto the cardstock in a random pattern. You need not only use letters and numbers. You can add any leftover stickers lying around to your design.
Step Three: Paint a layer of acrylic gesso over your entire surface area. If you don’t have gesso, regular acrylic paint will do fine. If you’ve used a dark piece of cardstock, you may need a second layer of gesso.
Step Four: Add some colour to your textured background with some mists. For a more intense colour, you could paint over the gesso with a coloured acrylic paint.

Now that you have your base you could kick it up a notch and add some stamped images or maybe even some embossed images. If you want to define the sticker patterns you can outline them with stickles or maybe even add some textured pastes. Because the stickers are covered in gesso/paint first, leaving you with a neutral base, you can combine leftover stickers from several different sheets to create a single background.

Saturday, October 15, 2011

Tutorial - Corrugated Board Frame

I do a lot of online shopping so I have a constant supply of cardboard boxes coming into my home. At first I used to just throw them all away until I realised the true value of corrugated board and what a gorgeous backing it made to just about any kind of paper crafting project. Now I hold onto those boxes and cut them up into manageable size pieces to be used on projects as I need. Today I’d like to share a fun way of making your very own photo frame using some corrugated board. This was a tutorial featured in the August issue of Scrapbook News and Review Magazine

Supplies
Corrugated board
Cardstock
Molding paste
Extra thick gel medium
Glass beads
Mist
Flowers
Step One: Depending on what size frame you want you need to cut two pieces of corrugated board the same size. I used an existing frame I had as a template so I cut two 6x8 pieces.
Step Two: Now cut an opening for your photograph in one of the pieces only. I cut a 3.25x5 opening for my photograph.
Step Three: Remove the top layer of paper from the corrugated board. I suggest that you don’t remove all of the paper. Leave some random pieces in place because this adds character to your project once you add the colour.
Step Four: Add some molding paste to two of the corners across from each other. Use your fingers to create texture and patterns in the molding paste. Then add some extra heavy gel medium to the side panels. Embed your glass beads into the gel medium while still wet. Set this aside to dry. Depending on the amount of molding paste you added you may need to leave it to dry overnight.
Step Five: While your pastes are drying you can work on the back panel of your frame. Use an existing frame as a guideline to cut out the frame stand. You need to do your measurements carefully so that your frame will have the right balance. If you cut your stand too low or high your frame may not be able to stand up on it’s own.
Step Six: Add some liquid adhesive to your panel. It is very important that you not add any adhesive to the “stand” part. You may want to push the stand out before adding the adhesive to ensure that you don’t accidentally get any on it.
Step Seven: Cut a piece of cardstock the same size as your frame and stick it to your back panel.
Step Eight: Lift the stand out of your panel and check that it will allow your frame to stand on its own. Here’s a side view of the frame.
Step Nine: Once the molding paste and glass bead embedded gel medium has completely dried, set it on your craft mat and mist with the colours of your choice. I used some Lindy’s Stamp Gang Moon Shadow mist. I’m love these two toned mists. I used Buccaneer Bay Blue and Tawny Turquoise.
Step Ten: Add some flowers to your frame over the molding paste. I used some white flowers which I also misted with the same Moon Shadow mists. I suggest you stick your flowers down with a hot glue gun if you have one.
Step 11: Stick your photograph onto the cardstock surface of your back panel. Again, measure carefully to ensure that your photograph is centred with the opening of your front panel.
Step 12: Now stick your front panel onto the back panel.
Step 13: Stand your frame up pull the stand out. You may need to play around and make adjustments until it’s able to stand completely stable.

These would make a great personalised gift for a friend or family member. Another option would be to not add the front panel to a stand but use it to frame a photograph on a layout instead. Either way, these are great fun to make and a creative method of recycling your postage packages.