This is a simple but very striking background technique. It is also very quick to put together so works well if you're short on time but still want to create something with a little "wow" factor. The entire layout took me less than 2 hours to complete and that includes having to stop to take pictures for the tutorial. Considering I can sometimes spend days on a single layout, this is probably the quickest layout I've ever completed.

There is 2 parts to this tutorial. The first being the background patterned paper you'll create using one of Tim Holtz's techniques and then I'll show you how to put it all together. The stunning corner bouquet comes from my very dear friend Katie's stunning etsy shop which you just have to check out. she makes some of the most incredible flower bouques you'll ever see.

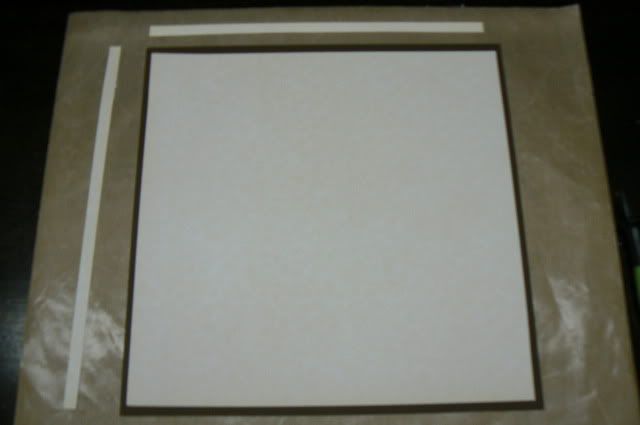
Supplies (please add bullet points)
Cardstock or a lightly colored piece of patterned paper.
Distress ink in 2 or more colours
Blending tool
UTEE powder
Heating tool
Craft iron
Ranger wonder tape
Ranger gloss paper cut to 6x12"
Alcohol ink
Felt pads for alcohol ink application
Scissors
Ruler
marking pen or pencil
PART 1
Step One: Cut 0.5" off the top and one side of your lightly colored cardstock or patterned paper. This is so you can matt you background artwork against a darker or contrasting piece of cardstock at the end of your project.
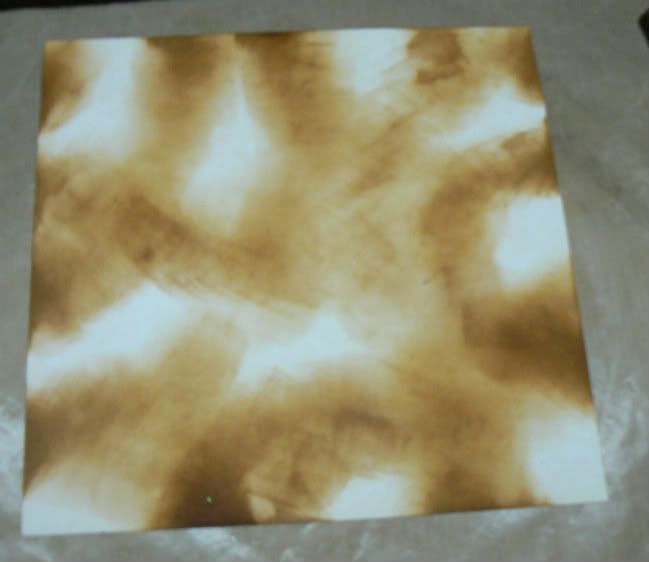
Step Two: Using your lighter shades of distress ink (I used vintage photo), ink up your piece of paper as shown. Remember to leave some pieces un-inked because you still have your darker shades to add.

Step Three: Crumple your piece of paper into a ball. You want to keep scrunching it up to form as many creases as you would like your finished piece to have.

Step Four: Slowly and carefully un-crumple the piece of paper, being careful not to tear the paper. Don't completed smooth the paper out. Ink up your blending tool with your darker shades of ink (I used walnut stain) and lightly run it over the surface inking up all the raised creases. You can also ink the paper edges at this point. Then, using a mini mister filled with water, lightly mist the entire paper surface.
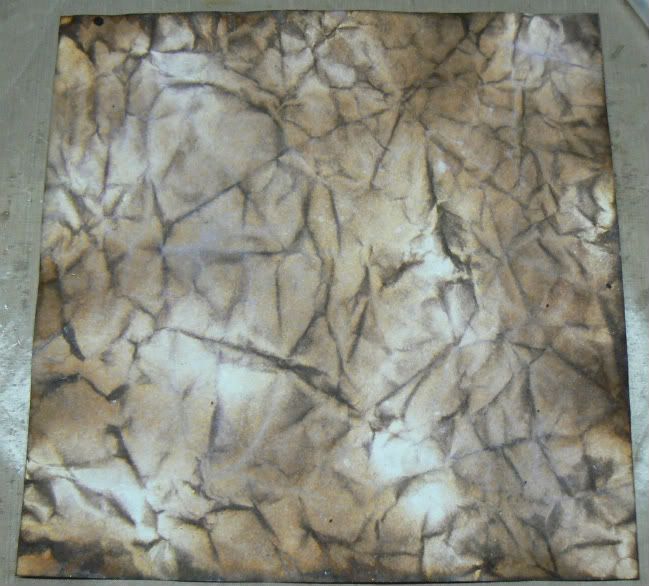
Step Five: Using your craft iron, iron the entire surface until it is completely flat and dry. Using my heat resistant craft mat, I turned my paper over and ironed on the back side. The colors of your inks will lighten significantly as the paper dries.
PART 2

Step One: Set your background paper aside and collect your piece of 6x12 inch glossy paper, your alcohol inks, blending tool and felt pads. Using as many or as few colors as you like, ink up your glossy paper using a stamping motion, covering the entire surface. I used espresso and gold mixative for my piece. Set this aside while you finish preparing your background paper.

Step Two: Getting back to your background paper, draw out your pattern you want to create as your background with a pencil or light marking pen. I stuck to a simple design.

Step Three: Using your pencil markings as a guide, add some Ranger wonder tape to your background as shown above. Remove the top layer of red plastic film from the tape in preparation for your UTEE powder.

Step Four: Pour your choice of UTEE powder over the wonder tape (I used bronze UTEE), making sure that all the tape has been covered. Dust off any excess powder onto a spare piece of paper and funnel back into it's container.

Step Five: Using your heat gun, heat up the UTEE powder until it begins to melt. If you would like a more distressed finish you can sprinkle additional UTEE over the area as you heat.
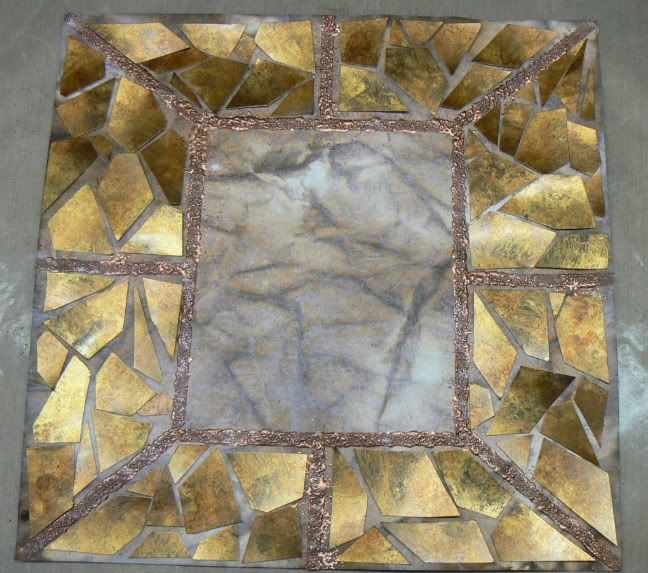
Step Six: Now we finally get to the fun part. I suggest you use half of your 6x12" inked glossy paper to cut up various shapes and sizes which you can then randomly place onto your designated areas on your paper. The other half of your glossy paper can be used to custom cut pieces for specific shaped gaps. Think of it as creating your own puzzle where you get to cut the pieces to MAKE them fit. Once you have all your pieces fitting, you can glue them down one piece at a time so you don't misplace them.
You can create any design you like using this technique. If you would like to be more creative and not be limited by straight lines then use an embossing pen to mark your areas in place of the wonder tape. Use as many or as few color combinations for the glossy paper tiles as you like. You can even go so far as to create a picture, like a rose for example, as your background. You can also scale it down and use the technique as a card, tag or ATC background.
Great layout and what an awesome technique. Thanks for the inspiration and for sharing the tutorial.
ReplyDeletevery cool wendy. tfs
ReplyDeleteAwesome tut..thank you!!
ReplyDelete