Butterflies are fun and whimsical, which is what makes them one of my all time favourite embellishments. There are so many materials you can use to make them, each delivering a unique finished look. You can print and cut them out of transparency for exquisite details and colours, die-cut or punch them out of cardstock or fussy cut them out of patterned papers, to name just a few ideas. What I'd like to share with you today is making use of a combination of cardstock, fabric and trim to make a butterfly embellishment that will certainly be a one-of-a-kind.
Supplies:
Cardstock
Fabric (I used satin)
Trim
Gel medium
Stickles
Pearls
Floral wire
Fabrictac
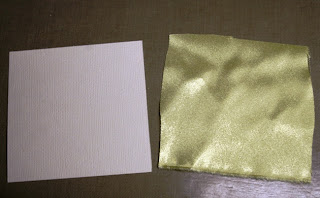
Step One: Gather your supplies together. Cut a piece of 3x3" cardstock and fabric. I used satin fabric for my project for added shimmer.
Step Two: Add a layer of gel medium to your cardstock and then stick the fabric onto the cardstock. Try and make sure that there are no air bubbles between the fabric and cardstock.
Step Three: Using some fabritac, glue your trim onto the fabric as shown above.
Step Four:Keep gluing the trim down until you have covered the entire surface area of the fabric.
Step Five: Turn your fabric over to the cardstock side. Draw a butterfly image onto the cardstock. I used a cardstock butterfly I had in my stash to trace my image.
Step Six: Cut out your butterfly using a sharp pair of scissors. If your have a butterfly die cut then you can use that instead. To finish off your butterfly add some stickles to the edges, use pearls for the body and some floral wire for the antennae.
Depending on the trim you add to the fabric, you can give each butterfly a life of its own. You can use mono tones as I have or you can use a rainbow of colours with a mixture of textures. No matter what you choose, each butterfly will be a mini art piece of its own suitable for any layout or card.


Wow that is super cute.
ReplyDeletethe project is so beatiful,you give the idea how to used satin for butterfly.thans
ReplyDelete