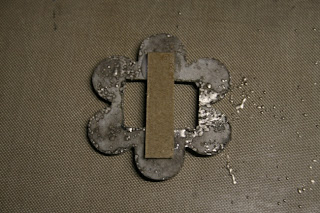
I love using metal ribbon clasps on my layouts for they always seem to add a special finishing touch. They also simplify the process of making ribbon bows. However, they can be a little pricey and sometimes hard to come by, especially if you're looking for something specific. I'd like to show you how you can turn an ordinary piece of chipboard into a lovely ribbon clasp. This tutorial was featured in the July copy of Scrapbook News and review magazine
Supplies
•Chipboard piece(s)
•UTEE
•Stamp
•StazOn ink
•Heat gun
Step One: You have the option of cutting your own chipboard die or you can use a store bought one as I have done. I have several floral dies I'd love to use for this. If you’ve made your own paper flowers for the project, it would be a good idea to use the same die to cut your chipboard.
Step Two: Cut a rectangular piece out of the center of your chipboard die. The size will depend on the size of your die. You want to make sure that you don't cut too close to the edges because that will weaken your die and it may tear when you add the ribbon.
Step Three: Emboss your piece with two or three layers of UTEE. I used the platinum UTEE for my example. Allow the UTEE to dry between layers and then coat with more embossing ink, add another layer of powder and heat with your heat gun. Three layers gives you a nice thick and smooth finish.
Step Four: Using StazOn ink, stamp over the UTEE. I used a script stamp from Heartfelt Creations. Flourish stamps also add a nice girly touch. The stamp you select can change the entire look of the piece so keep the theme/style of your project in mind when selecting your stamp.
Step Five: Turn your chipboard piece over. Cut a narrow strip of spare chipboard out. You want it long enough to fit over your rectangular opening and narrow enough to fit your ribbon through on either side. Glue the piece down with some strong adhesive. Set it aside until the glue has completely dried.
Step Six: Turn your piece back over and slide your ribbon or lace through your clasp.
If you've ever used a set of chipboard dies and you have a couple of pieces left over that you don't know what to do with, use them to make ribbon clasps. You can even use printed chipboard because your UTEE will cover up any pattern or print underneath. This is also a fun way to add some of your themed chipboard pieces to your project. If you want to keep the print of your piece consider adding clear UTEE instead of the colored.


ok, this is GENIUS Wendy! LOVE it! I'll be making this very son! Thanks for the tip :)
ReplyDeleteumm, this ROCKS!!!
ReplyDelete