Incorporating mixed mediums into your scrapbooking layouts may be a little daunting to most traditional scrapbook artists, but it need not be. Adding a little texture to a paper flower using a paste is an easy way to add a unique touch to your layout. Let me show you how.
Supplies
Flower die cut or punches in various sizes
Cardstock
Molding Paste
Alcohol Ink in several colours of your choice
Blending tool to apply your alcohol ink
Clean felt pads
Brad or your choice of flower center

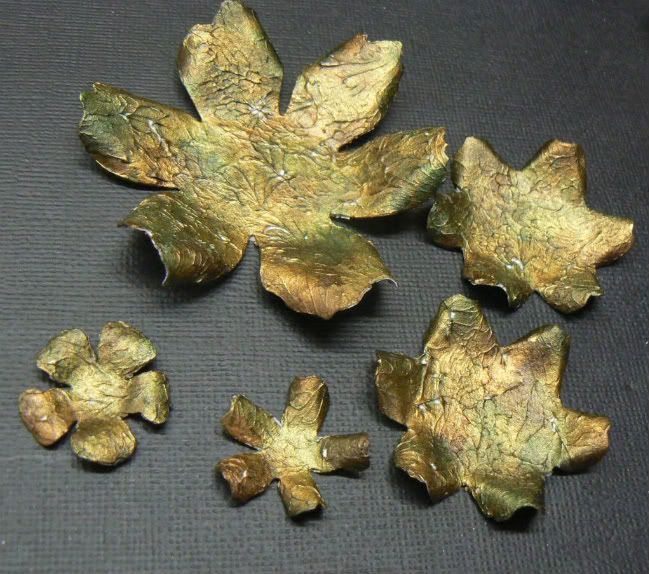
Step One: Gather all your supplies together. Using you die cut or punches cut out one large, two medium and two small flowers. I used the Sizzix tattered florals die for my flower.

Step Two: Apply a relatively thin layer of molding paste onto your paper flowers. Use your finger to create a textured surface by lightly tapping the paste which will then create peaks. Because molding paste is a slow drying product, and I didn't want to sacrifice my non-stick craft mat while it was drying, I placed my flowers onto a piece on cling wrap which I could then put to one side while it dried.

Step Three: Leave to dry overnight so that it dries completely before you start adding your alcohol ink. The dried paste will have a matt finish.

Step Four: Using a combination of alcohol inks on your felt pad with a blending tool, colour your flowers. I used a combination of Pesto, Espresso and Gold mixative for my flowers.
Step Five: Using a thin paintbrush handle curl the edges of your petals. Placing one finger at the base of each petal gentle pinch and lift the petals together creating a "v". You can curl the petals of one small flower back and pinch the petals of the other.

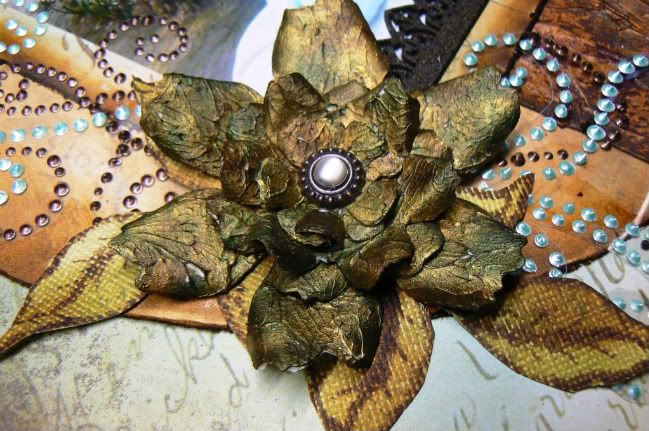
Step Six: Layer your flower starting with your large flower at the bottom, then add your two medium flowers alternating the petals. Then add the small flower with the petals curled backwards and lastly add the small flower with the pinched petals. To finish off add a brad which you can pierce through all the layers to hold your flower together. If you don't use a brad as your flower center then glue each layer to the next as you go.
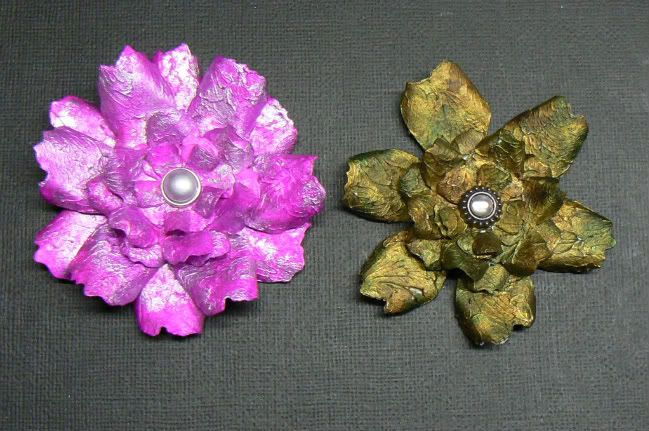
These flowers can be made using any flower petal shapes you like and can be perfectly co-ordinated to your project with your selection of alcohol inks. If you want a more fuller looking flower then you can add a second large flower as I have done with my pink example below.
These are gorgeous!! tfs
ReplyDeleteSuch stunning flowers you created!!! You always make such creative embellishments!! Sabrina
ReplyDeleteBeautiful Wendy!!!
ReplyDeleteGORGEOUS...luv these!!
ReplyDeleteGorgeous flowers!!! Thanks for sharing!
ReplyDeleteAwesome tutorial Wendy!! Thanks for all the great pics and super easy instructions!! I can't wait to make some... thanks for the inspiration!!! :) hugs... Tracy
ReplyDeleteFound my way here via Gerry's blog.....thanks for sharing this wonderful tutorial! Those flowers look amazing :)
ReplyDelete