Wednesday, June 20, 2012

Mixed Media Canvas/layout

It's been a while since I've been online due to having to deal with some urgent personal issues but I've really missed crafting and interacting with all the fab crafty ladies online so I've made a commitment to get back into the swing of things as soon as possible. I thought I'd get the ball rolling by posting a LO I did a while back but never got around to posting.
It's one of my favourites for several reasons. Firstly, it was one of my first attempts of combining mixed media canvas work techniques with scrapbooking and secondly, I absolutely adore this picture of my DD and teal/turquoise are some of my favourite colours.
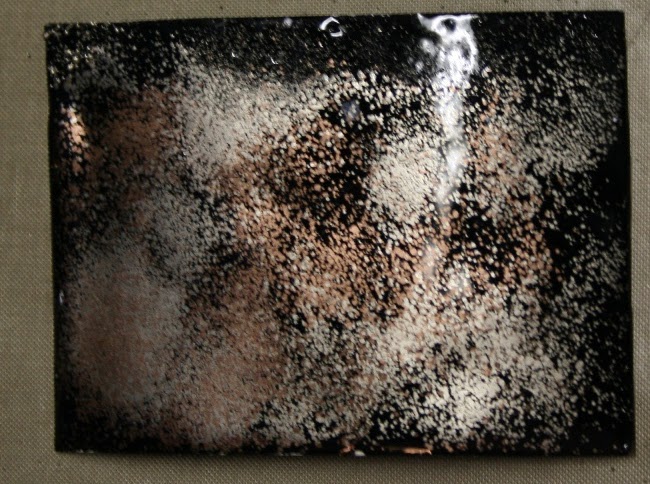
To start I first covered the entire canvas with some gesso beceause at that point I wasn't quite sure which direction I was headed so I wanted a good foundation to work on no matter what. I then misted some Pink Paislee mistable pp's with some of the divine Lindy's Stamp Gang starburst sprays. I placed the misted pp in the centre of the canvas so that it could be used as a solid background for my photograph. I then really got my hands dirty and had a blast adding some textured molding paste to the canvas forming a border around the misted pp. I used my finger to create some swirls in the paste along the right border and then used a palett knife to tap the paste to create that really fantastic looking textured finish at the bottom of the canvas. I wanted to try something completely new and unique so I dug out some glass chips I had used for a one of my kids school projects and did a glass mosaic type  finish along the left and top of the canvas. I did this by first adding a thick layer of molding paste to the canvas which I then embedded the glass chips into. I didn't want the traditional smoothed out finish you would normally do with mosaics so I left areas unfilled between the glass chips for a more distresed finish.
Once the paste had dried I coloured between the glass chips using several colours of LSG mists, starburst mixed with gel medium to create a paint and just went to town....!!!! This really was one of the most fun projects I've worked on.


After my background and canvas base was completely coloured and had dried I added my pic and some embellishments. I used the same LSG mists and paints to alter the iamroses flowers as well as this mini tag I made by adding wrinkled tissue paper to a normal mail tag with some gel medium. I then embellished the tag with some gems. I also coloured the lace and white photo corners with the LSG paint. I finished my project off by adding some gorgeous Prima flourishes.
I intend on trying a few more of these type projects in the near future because they're great fun to work on and it's a perfect opportunity to try new things you can't always get away with on paper bases.

Thanks for stopping by.........


Tuesday, April 24, 2012

Rendezvous of Randomness First Challenge up and OPEN!!

This picture of my youngest DS was just perfect for the launch of yet another STTG monthly challenge called Rendezvous of Randomness being hosted by my fellow STTG DT member, Adrienne Ford. Adrienne is an incredibly talented artist and is well renown for her brilliant background creations. Her colour blending skills are true perfection and I personally look forward to seeing every new masterpiece she creates.  
The Rendezvous of Randomness challenge is just that.......Random! Adrienne will select a different challenge every month which will be posted on the 21st and run until the 20th of the following month. Like all the other STTG Challenges there will be  a $20 STTG STORE VOUCHER up for grabs in a random draw.
Her first challenge is this beautiful "Spring is in the air" colour challenge with a few extra twists.
  • Use the five color palette and matching photo as inspiration to create your project. Try to get the colors as close as you can to the palette. However, please don't stress- the point is to just have fun!

And because we all like a good twist here are some added things you can do to stand out in the gallery!
  • Twist #1- Because Spring IS in the air, add a nature element to your layout- this could be a bird, butterfly, or whatever "nature" is to you. Please specify in your description what element you chose. 
  • Twist #2- Add a wet medium to your background. This could be paint, gesso, inks, dyes, mists, etc. 
For my DT challenge contribution LO "Cool Beach Boy" I used both twists. I used my Dusty Attic Chicken Wire piece with some gesso to stamp on the white cs which I then misted over with some homemade mist to create my bg. I also added the large yellow butterfly as the second twist.
All the chippies on this were altered with some gesso which I layered on quite thick and then tapped with a finger to create extra texture and dimension.

Items used from the STTG store
Dusty Attic Chicken Wire panel
Dusty Attic Picket Fence
Zva Creative roses

I hope you'll come and join in the fun!!


Saturday, April 14, 2012

STTG - First 3D Sketch Challenge

One of my fellow DT members at STTG, Doris Widder,  is hosting a monthly sketch challenge called 3D Sketches starting today. The challenge runs from the 14th to the 14th of every month.
It's a sketch challenge with a twist....3 twists to be specific. Doris will provide a sketch as well as a choice of 3 additional twists to use on your project. You are only required to use 1 of the three twists to qualify for the challenge.

This is the sketch provided for April
The three twists we were given to choose from are chipboard, embossing and distressing.
I decided to use all three twists because they all seem to go together so easily. I heat embossed all the Dusty Attic chipboard pieces and used water distressing along with gesso for some extra punch.

So.....if you enjoy sketch challenges then please drop in and join the 3D Sketches Group. Not only will you have the oportunity to become part of a great group of ladies but you'll also stand a chance to win a $20 store gift voucher. There are so many wonderful items available in the store, many of which i used on my LO above, namely;

Glitz Pretty in Pink collection
Petaloo Large Wild Roses
Petaloo mini Canterbury collection
Zva Creative roses
Crinkled ribbon
Silk Ribbon
Viva Pearl Pen
DA Sweat Pea Frame set
DA Scroll Border #1
DA words - Enjoy the Moments 

Tutorial - Creating Backgrounds using UTEE

Let me tell you, UTEE is far more than just an embossing powder. This is one amazing product and definitely one of my all-time favourites under the Ranger umbrella. The versatility of this single product is actually mind blowing. You can use it for regular embossing or to make incredible embellishments using the melting pot. As much as I love all of that I'd like to share my personal favourite techniques using this product which is creating backgrounds. I have three effects I'd like to share with you, two of which don't require a melting pot so sit back and enjoy.
 Supplies
UTEE in several colours
Heat gun
Melting pot
Cardstock or triplex board
Toothpick

 Marble Background

 Step One: For my demonstrations I'm using an ATC size background base on some recycled cereal boxes cut down to size. Apply embossing ink to the entire surface area, add UTEE powder and emboss using the black UTEE with your heat gun. Using the black UTEE as a base provides a great contrast against the metallic colours I'll be adding. You will need to repeat this step 3 times for a nice thick and solid base.
Step Two: While your black UTEE is still hot start adding some of your first metallic UTEE which is the platinum in my sample. You need to only add a very little in small areas around your base. You'll notice that the UTEE starts melting almost instantly. Use your heat gun to melt any powder left.
Step Three: Using a toothpick while the embossing powder is hot and almost liquid like on your base start swirling it around mixing the metallic powder with the black creating a marble like effect. If you feel it starting to harden then just zap it with the heat gun again long enough for it to melt again.
 Step Four: You can leave your project as is or you can add a second metallic colour to the mix as I did using the bronze UTEE powder. Again swirl the melted bronze powder around with the toothpick creating a multi toned marble effect....isn't this just gorgeous?
A practical use for this technique would be to alter some chipboard lettering or shapes. This would make a perfect accent to a layout and just look at how delicious that marble effect looks.

 Drizzled Background

 Step One: For this technique you will need a melting pot and three or four different colours of UTEE. You can use whichever colours you like according to your own personal taste. Melt just a little of your first colour in your melting pot and once it's completely melted drizzle it onto your non-stick craft mat in a random pattern as shown above.

Step Two: If you have project pan then you can go ahead and use a new pan or simple clean out your pot and add the second colour UTEE. Again let it completely melt and then drizzle that over the first layer.
Step Three: I added a layer of black in between steps and then as my final layer used some of the pearl UTEE. Again melt your UTEE and drizzle over the previous layers.

Step Four: Once the UTEE is completely dry, which only takes a few seconds, you can lift your drizzle sheet from your craft mat and add it to your background base. If you're using it on a ATC, card or tag then just cut down all the excess bits. You can attach it to your base using some gel medium or a glue that will dry clear.
 I made my pattern quite condensed but you can obviously spread it out more for a less bulky effect.

Peaks and Valleys background
Step One: For this technique you'll need to start with a black base as we did for the first technique. Three layers will provide a nice thick and solid foundation.
Step Two: Now add two more colours to the base while the Black UTEE is still hot. Use your heat gun to melt any excess powder.
Step Three: Now for the fun part, using your heat gun very close to your project surface and at various angles start blowing the melted UTEE around so that peaks begin to form. If you use the metallic powders you will notice how patterns start to form in the direction that you blow the melted UTEE.

Step Four: Continue doing this until you have created the pattern you like. It's difficult to show the peaks and valleys in a picture but if you run your finger across your project surface it will definitely feel the uneven surface and the patterns make for a gorgeous finish.
 These are just three of my favourite background technique using UTEE. Each has a unique finish and can be adapted to whatever project you decide to use it on. Chipboard and ATC's deliver some of the best results. The Drizzle technique is perfect for a layout background too. Mix and match your colours and above all, have fun.
Here's a layout I did using these techniques on the DA Rustic Frame Set

Sunday, April 8, 2012

I'm hosting a DIY challenge over at STTG - $20 STTG gift card prize


I've started a new monthly challenge over at  STTG called Getting Messy D.I.Y. Style.

This challenge is all about creating homemade embellishments and/or incredible backgrounds for your scrapbook layouts. The aim is to hopefully inspire you to step out of your comfort zone and explore new techniques and styles or fine tune some of those you may have already tried.


Each month will have it's own theme so to get started the theme for Aprils Challenge is
TEXTURED MADNESS
So.....it's time to get your hands dirty with some pastes and colour mediums
It's important to note that the theme based tutorials and techniques are OPTIONAL and not required to be eligible to enter the challenge BUT if you do use them you will be given an EXTRA VOTE.
Challenge Prize: $20 STTG Store Gift Card
There are 2 options available to qualify to enter the challenge.
OPTION 1 - Create your own BACKGROUND PAPER
Create your very own unique scrapbook layout background paper using embossing, stencilling, masking, stamping, misting or any other creative techniques.
Textured Madness Technique Option: To earn an EXTRA VOTE use some molding paste, textured pastes/gels or gesso together with any type of colour medium to create your background.
To help inspire you here are some examples done by my fellow DT and myself
Rock Star Attitude by Wendy Greenaway
Here I jumped in head first and covered the entire piece of cardstock with molding paste and and resin gel which I then stamped into. I used metallic acrylic paint as my colour medium
Journey To You by Adrienne Ford
This stunning piece was done by Adrienne using molding paste and micro beads to create the butterflies. Adrienne used some homemade mists as her colour medium.
Easter 2011 by Gerry Van Gent
Typical of Gerry's beautiful whimsical style, she created this adorable Easter layout background using a combination of mists, fussy cuttings, molding paste and puffy paint.
OPTION 2 - Homemade Embellishment
Your layout must have at least one homemade embellishment clearly visible. This can be anything from a homemade paper/fabric bloom, pearl/rhinestone flourishes, polymer clay molded embellies.... The sky is the limit here. As long as you made it yourself and it's clearly visible on the layout, it counts.
Textured Madness Tutorial Option: To earn an EXTRA VOTE make a textured paper flower using the following tutorial.
In the tutorial I used alcohol ink as a colour medium but this can be substituted for any other colour medium.

Challenge Rules
  1. Challenge runs from 7th April to 7th May. Entries must be posted by midnight PST on the 7th May
  2. Entries MUST have at least one clearly visible homemade embellishment OR uniquely create background paper
  3. Themed techniques and tutorials are OPTIONAL and NOT required to be eligible for the prize. Using the techniques and/or tutorials will however earn you one extra vote.
  4. Please post your entries on this thread as well as in the main gallery. When posting to the main gallery please include "D.I.Y. #1" in your title.
  5. Winners wil be selected by the STTG design team and fellow contestants. Please send me a message on the 8th May with your TOP 2 votes. You need not vote for yourself as you will receive a vote for voting. Winners will be posted on the 9th May.
  6. Tracy will contact the winner with the STTG Gift card details soon after the winner has been announced.
Good Luck and have FUN!!!

This Challenge runs from the 7th to the 7th of every month

Friday, April 6, 2012

STTG #3 Challenge - $50 in pizes up for grabs!!

STTG #3
3 levels to play... and 3 prizes to win!! :)
ends at midnight on April 30th pst!!
This month we're featuring images from Hannah Nicole Portrait Studio!!
Please see below for more info!! :)
Colors...
Sunflower ~ Butterscotch ~ Auburn ~ Rosy Red ~ Rosebud Pink
Embellishments...
Roses ~ Velvet ~ Chipboard ~ Canvas ~ Metal
Textures...
Embossed ~ Wrinkled ~ Torn ~ Crackled ~ Puffy Paint
Techniques...
Lidia's Deep Distressing Technique
One of Wendy's NEW Stamp Techniques.....yes, that's me!!
Gerry's Puffy Paint & Dusty Attic Chipboard Technique

How to play!!! :)
Level #1
Pick at least 2 colors, 1 embellishment and 1 texture
Prize is a $10 STTG Gift Card... Winner will be randomly drawn
C'mon you can do it... just try... you'll have FUN!! :)
Level #2
Pick at least 3 colors, 2 embellishments & 2 textures
Prize is a $15 STTG Gift Card... Winner will be chosen by the DT
Hey look you could win more $$... but you've got some competition!! :)
Level #3
Use all 5 colors +black, 4 embellishments, 4 textures & 1 technique
Prize is a $25 STTG Gift Card... Winner will be chosen by the DT
Think you're ready for a real challenge?? Want to win even more $$$ Try taking on this one!! :)

Using additional colors...
You may use additional colors as long as the challenge colors are REALLY evident!! However... when it comes to judging level 2 or 3... the more you limit your use of other colors... the more likely you are to WIN!! :)

When uploading your image to the gallery...
Please include STTG #3 in your title... (including other sites)
Please put STTG_3 (exactly as shown) in the tags... so we can find you in the search!!
Please include which level you're entering in your description

Have FUN and try something NEW!! :)
You have until midnight April 30th PST
Winner will be announced on May 1st

Don't forget to checkout the STTG STORE. These gorgeous new Dusty Attic Blooms have just arrived and they're selling fast!!


You can also Pre-order some of the new Dusty Attic release pieces. They should be on their wy from Australia as we speak. Here are some of my favourite pieces I'm eagerly waiting for the arrival of


You'll find all sorts of hidden treasures in the store and don't forget that all US orders max out at $5.45........BONUS!!!!

Thursday, March 22, 2012

STTG #2 - Level 3 DT Project


This is my DT layout for the STTG #2 challenge which close 31st March 2012. I did this for level 3 using all four colours. I selected lace, pearls and flowers as my embellishments and the Pink Paislee resistable paper has a damask print on.

For the homemade flower I used my own No Sewing Fabric Bloom tutorial. I used some cream crushed satin fabric and made 8 cones for a lovely full bloom. I altered all the flowers and chipboard pieces using some creative inspiration paints mixed with a white pearl acrylic paint. For the chipboard pieces I added a think layer of paint which I then dabbed with the paint brush to create the uneven textured finish.

To give the photo a more distressed looking finish I dabbed some of the ice blue paint around the photo edges.

Items available in the STTG Store

Cream crinckled ribbon
Petaloo Mini Canterbury collection
DA Scroll border #1

You have until March 31st to post your entries for the challenge. Remember that there are 3 different levels so this challenge is open to paper crafters of all skill levels. Hope you'll come join in the fun.
TFL

Tuesday, March 13, 2012

STTG #2 - Level 1 and 2 DT projects


Level 1 - Select 2 of the four colours provided plus 1 embellishment of the four options


STTG # 2 Challenge options
Colours to select from: Ice Blue, Lavender, Gray, Cream
Embellishment options: Flowers, Pearls, Lace, Bling

For my DT project for Level 1 I knew it would be virtually impossible for me to create a LO using only 2 colours and 1 embellishment so I decided to go another route and create a card for a friend's baby's upcoming first birthday. Because it's for a boy I decided to select Ice Blue and Gray as my colours and used flowers as my embellishment.
I misted some of the white crinkle ribbon with Licorice Shimmerz mist and painted the white Zva mini roses I had with some light blue Creative Inspiration Paint which also has a beautiful shimmery finish.

I altered my chipboard pieces by first painting them with a light blue acrylic paint which I then coated liberally with some Ranger Rock Candy crackle paint. Once the crackle paint had dried I went over the pieces with some black soot distress ink to provide more definition to the cracks. I wiped away the excess ink with a paper towel so that only the ink between the cracks remained.

Items used from the STTG STORE
Ranger Distress Cardstock
Zva mini roses
Petaloo Canterbury Collection
Crinkle Ribbon
DA - Cameo Ribbon Slide

Level 2 - Select 3 colours and 2 embellishments
For my level 2 project I again decided not to do a LO but chose to alter a wooden memory block I've had lying in my cupboard for several years already. I added a picture, title letters for my DD's name, a frame jounal piece listing her birth details and then another jounalling piece with some memories of what she was like as a baby.
 I selected to use lavender, gray and cream as my colour combination and chose flowers and pearls as my embellishments.

I was originally going to use one of Erins baby pictures but then decided to use this family shot instead. This picture was taken only hours after Erin was born. It was a very significant moment for me because I had been a single mom for over 4 years before my DH and I met so my DS Jarrod had been used to having me all to himself. I worried throughout the pregnancy about how he would react to having a baby in the house so we wanted him to meet his sister as soon as possible so that they could form a bond. By the look on his face in the pic and the strong bond they have today, 6 years later, I'd say it was a wise decision.

I created the cool textured finish of these DA alphas by simply add a thick layer of metallic lilac acrylic paint to each letter and then dabbing the paint brush into the paint creating peaks.  It looks really beautiful IRL.
This is a snap shot of the other side of the block. I was rather dismayed to realised that I had missed painting over several spots of my red Zva roses. I was working on this project late at night and obviously got too tired to notice the finer details like the roses and some of the sides of the chipboard pieces weren't painted properly. But then again, it's mistakes like those which make projects all the more real to me rather than being purely show pieces.

Items used from the STTG STORE
Distress Cardstock
Zva roses
DA Alphabet set- Dusty Curls

Now that you see how easy level 1 and 2 for the STTG #2 challenge is, I hope you pop in at the new STTG NING  site and jpin in the fun. The challenge is open until the 31 March.
I'll be back to post my level 3 project soon so watch this space!!!

Wednesday, March 7, 2012

DUSTY ATTIC - GET IT WHILE STOCK LASTS!!!


Tracy from STTG has finally received her long overdue orders of Dusty Attic. The STORE is bursting with stock but I must warn you that STOCK IS MOVING FAST!!!!!

SO GET SOME DELICIOUS DUSTY ATTIC CHIPBOARD DESIGNS WHILE THEY LAST.

Here are some of my favourite which are IN STOCK and ready to be shipped (for now, that is.....better hurry!!)