Monday, July 26, 2010

~ Angelic~


I took this picture of my DD while we were at one of her friends birthday parties. She was standing off to the side and just watching everyone with a really thoughtful look on her face so I grabbed my camera and zoomed in so she wouldn't know I was taking a pic and snapped what is now one of my favourite pics of Erin.

I made this LO for the July Monochromatic colour challenge hosted by one of my dear friends and fellow Deliciously Distressed Diva's over at sb.com. there'sa different colour for each week with a set of twists. Week 2 was to use white with a B&W photograph and use coloured embelies.

This is a fluffy ballerina bloom I made using my very own tutorial which you can find HERE.

For this one I used soft chiffon which works really well for these. The metal center I found in a bead store and added a pink pearl.


I used the brilliant Gabrielle's 6 petal puch rose tutorial for the tiny pink roses. I added a leaf just to add a pop of colour against the stark whiteness of the background.


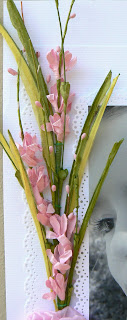
I cut the butterfly out of some pp I had in my stash and added some shimmerz paint and liquid pearls. the butterfly tail flourish is from Angellica's ETSY SHOP which is full of some of the most AMASING embellishments.


This is another gorgeous vine I boight from my good friens Katie's etsy shop which you can find HERE. These just add the perfect femanine touch to any LO!!

Tutorial ~ No Sewing Fabric Bloom


I was on Prima's blog looking at some of the CHA sneak previews  and was inpired by some of the new blooms under the Jack and Jill range and decided I just had to try making some of my own, which is an idea my dear friend Rebecca (Byondbrz) and I shared at the same time. Mine are slightly different to Rebecca's so we've decided to BOTH do our own tutorials. You can find her verion using only 5 petals vs. my 7 HERE.  In the pic above I've made them using different textured chiffon and some netting. That's the great thing about the tutorial, you can use just about ANY fabric.
For the tutorial I've selected some satin.
What you need
* Some fabric of your choice cut into 7-8 circles. I only have 6 in the pic but actually used 7, a mistake I only realised at the end of the tutorial...LOL! the circles can be any size depending on the size of the bloom you want. I made mine about 3inch in diameter. They don't have to be perfect so scissor cutting them is just fine.
* Hot glue gun or fast drying fabric glue (not sure what brands are in the US)
* small cardstock circle (I used a petal punch I had on hand)
* Flower center (beads, gems, buttons,whatever you like)


STEP 1

Fold your circle in half. Unlike Rebecca, I don't add glue to the centre in this step because I like mine to have extra volume.


STEP 2

In your mind divide the half circle into 3 pie shapes all meeting in the center. Fold 1/3 of the fabric over the 2/3 of the fabric as shown in the picture.

Ok, so I'm craving pie while I'm writing this...LOL! but it hopefully makes sense

STEP 3
Add some hot glue to the fabric at the bottom tip and then folder the 3/3 of the fabric over, glueing it to the 1/3


Your fabric will then be cone shaped and look like this


STEP 4

Now do the same with the other 6-7 fabric circles, creating 7-8 fabric cones.


Step 5

Add some glue to the center of your cardstock circle (I used the petal punch I had on hand). This is just for the backing so no-one sees it so you can use whatever you want.


STEP 6

Glue the tip of your fabric cone to the center of your cardstock circle as shown.


STEP 7

Now add a little more glue to the center and attach your second cone,  over-lapping it slightly over the first cone.


STEP 8

Continue doing this, slightly over-lapping each cone over the one before. Once you've attached 6 cones you will notice a small gap. This is where the 7th cone is required. The 7th cone may stand higher than the others which is ok because the center will be flattened with your Button/brad/beads.

This is a side view of the bloom to show the fullness created by the cones. The more glue you apply when making the cones will control the fullness. For a flatter bloom glue the cones together higher up.


Add your flower center and VIOLA, you're done!!!

Friday, July 23, 2010

~Mommy's BOY~


Let me start by saying that this LO is a lift of Robin's (Robinberdz on sb.com) "Dream" LO she did for Swirlydoos. I just loved the simplicity of the design and had to do one of my own. I changed mine up a bit by adding some layers for a more distressed look but the core design is Robins.

This is a pic of my eldest son Jarrod and myself. He's nearly 12 now and is sooooo close to the age when mom's no longer cool so I try take advantage of every cuddle I can get....LOL! You can already see the "oh no, here she come for anothet hug" look on his face..........

I used the Bo Bunny Mamma Papparazzi pp's for this. I just LOVE those papers!!! The lovely flourish is one I bought a while back from Nicola Lombarda's fabulous etsy shop. She has the most amasing collection of paper flourishes.......a def MUST SEE!

I also made the fabric blooms myself. I was inspired by the new Prima blooms and decided to give them a bash. For these particular ones I used 8 fabric cones to create a fuller bloom. Rebecca (Byondbzr) and I had the same idea but she posted her pics first on sb.com so it's only fair that she take credit for the tutorial. I'll post a link once she  has done one.

Friday, July 16, 2010

~ Grans Darling ~


Ok, if you read my earlier post you may have noticed the pictured changed. I managed to take a quick pic of the LO with the new photo of my mom and the kids. I've left my close-up pics as is because there wasn't enough time to re-do them. I'm giving it to my mom this evening in the shadow box frame I also made myself for the LO. Pics posted at bottom of post.

My mom's colour scheme in her lounge is black and pale pink, hence my colour choice. My mom also LOVES owls so when I saw this pp from My Minds Eye, I knew I had to use it.

I made this pink, grey and black bloom myself with some satin fabric. I just cut the fabric into various size rose petal shapes and then lightly burnt the edges so they would curl in and then just layered them largest to smallest.

I made these using the Distressed Camelot flower tutorial I'm featuring in both my DIY challenge at sb.com as well as my DIY group over at pages in time. I used pages from an old novel I was about to throw out. So I'll also be entering this in Lisa Valentine's Go Green challenge over at PIT

This adorable vine is from my very good friend Katies lovely etsy shop. She really does have a knack for making just the most perfect embellishments and this one worked perfectly for my LO.
I used Robins wet distressing technique around the border of the pp and the half circle pp. I just LOVE the effect of this technique. I also wanted to show off the owl in the pp as best as possible so created a moon shape around the owl.
And finally here's the shadow box frame I also made from scratch. I bought some wood cut to size fom the hardware and spray painted it black and viola, you have a shadow box frame at a fraction of the cost of store bought frames. I would've like to do more to the frame but my mom insisted I only alter it in a subtle way so therefore I only added a few little flowers and made the flourishes with liquid pearls.

Thursday, July 15, 2010

Tutorial - Fluffy Ballerina Blooms


The other night while my mom was over visiting we were fooling around with some fabric and she sewed a scrap length of fabric I had together and came up with these. I instantly fell inlove and just had to share this. I know there may already be a tutorial out there for these but I personally haven't found one yet so here goes......

What you need:
1. Very soft fabric like crushed organza or chiffon
2. Needle and strong thread - I used 2 stands of embroidery thread
3. small cardstock circle for back of bloom
4. Flower centers
5. Glue - I used a hot glue gun

Step 1 - It's important to decide what finished look you want BEFORE cutting your fabric
The width of the fabric will depend of how big you want your bloom. The fabric gets folded over so decide how wide you want your bloom before cutting the fabric. The large blue bloom in the pic above is approx 4inch wide finished and my fabric was 3 inch wide. For a smaller bloom obviously decrease the width.
The length will dictate how ruffled your finished bloom will be so again decide before cutting you fabric.
For the large blue bloom my fabric was 3inch wide and 1.5 yards long
For the smaller blue bloom my fabric was 2.5 inch wide and only 1 yard long (less ruffles)
For the yellow bloom my fabric was 2.5inch wide and 1.5 yard long

Step 2 - Fold width of fabric in half and do running stitches along the edges as shown in the pic


Step 3 - Once you reach the end try and untwist all the ruffles so that the sewed edges are all on one side


Step 4 - Take the 2 ends of thread and pull together so that the ruffles form a circle with the sewed edges to the center. AGAIN make sure to untwist the fabric and all the ruffles are facing outwards.


Step 5 - PULL TIGHT but carefully as to not break the thread. Once you have a tight center knot the thread several times and cut off excess thread.


Step 6 - You will notice that the bloom is VERY puffy so that is why the next step is important if you plan on using the bloom on a LO.
Turn the bloom over onto the back side and apply some glue (I used my hot glue gun) and attach the center of the bloom to your piece of circular cardstock. This will pull the front center of the bloom inwards and flat againt the cardstock creating a ballerina effect.


Step 7 - Turn bloom back over and apply your flower center and VIOLA, you have your very own ballerina bloom.


I made this little pink one (about 2 inch wide) using some chiffon. For this size my fabric was 2 inches wide and about 1 yard long.


HAVE FUN AND ENJOY!!!!

Tuesday, July 6, 2010

PIT - Weekly tutorial

This weeks tutorial over at my DIY....because you CAN group at Pages in Time is by the very talented Rebecca, better known as Byondbzr over at sb.com. It's a really easy tutorial to follw and you can dress them up for something fancy or use fun and bright fabrics with fun centers for a more playful look. Why not  try these yourself and then post your picture in my group HERE for a chance to win a RAK

Each Monday I add a new tutorial so if you enjoy making you own embellishments then come along to the group and join in on the fun. You'll also find some other amasing groups and challenges to participate in over at Pages in Time. It's a wonderful community of very friendly and talented ladies.

Thursday, July 1, 2010

~ My Big Brother ~ PIT Thurs Sketch


This was the Thursday Sketch over at Pages In Time. Each week a new sketch is posted in the Thurs Sketch Group so come along and join in the fun, you'll be just in time for the NEW weeks sketch. All LO's posted are added to Karen's Blog for all to admire.

Here is my take on the sketch. When I first saw the sketch I immediately thought "GIRLY LO" but then I got home, looked at the pics I had on hand that would fit the design and decided to put my own spin on it by adding a little GRUNGE!!! So yes, there's loads of paper tearing, scrunching and everything is DISTRESSED to the MAX.....LOL!!! I don't think my 11 year old son would be too happy if I did a "girly" LO with pics with him in.......hmmmmm

Here is a close up of the grungy flower I made from book pages which I misted and obviously DISTRESSED A LOT!!!. The lovely flourish is from Niklindesigns1225.etsy.com. She has some of the most spectacular paper flourishes!!! The flowers tutorial will be a future featured item in my DIY....because you can group over at Pages in Time and is also one of this months twist options for my July DIY challenge at Sb.com. Both challenges have a RAK on offer so if you like making you own embellishments then come on over to iether or both groups and join in.