Polymer clay is one of my new found favourite products to play with. It's a very versatile product and I just love the life-like look of the finished embellishments. I have tried colouring it with several colour mediums but find that Ranger Perfect Pearls offer the best results. The Perfect Pearls offers easy coverage and is a great product to use if you want to use several colours together because the mica powder blends easily. I'm going to show you how to make some beautiful Singapore Orchids using polymer clay with Perfect Pearls. These are stunning embellishments to add to your layouts, cards to altered projects.
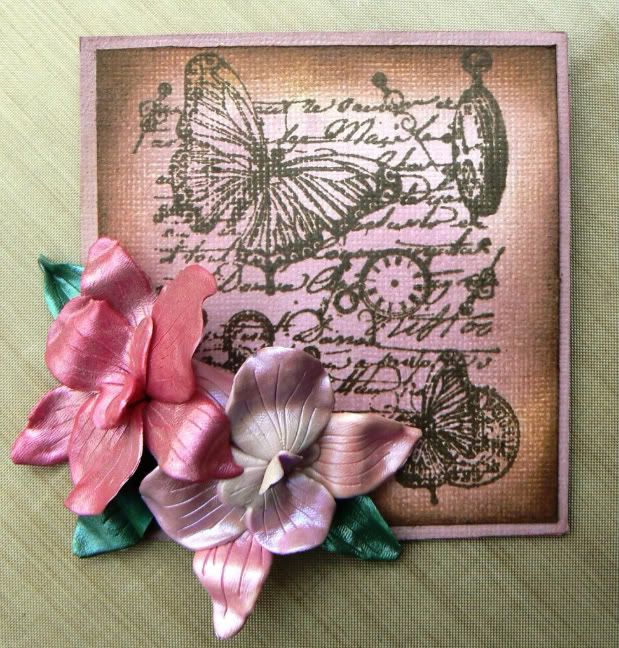
Singapore Orchids by Wendy Greenaway Supplies Cardstock: Bazzill; Stamp: Inkadinkado; Ink, Mica powder: Ranger; Polymer clay: Eberhard Faber

Supplies
Fimo Clay or any other brand of polymer clay in colours of your choice.
Perfect Pearls
Dusting brush (for the Perfect Pearls)
Singapore die cut
Note: The die cut I used was purchased at my local baking supply store. You will find several varieties of flower and leaf die cutters which are usually used for cake decorating. This particular set is the 5 piece Singapore orchid.
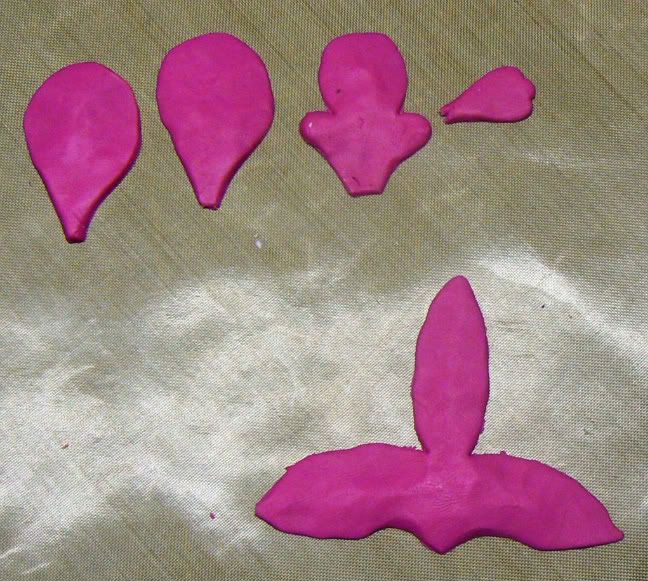
Step one: Gather all your supplies together. Break off a piece of polymer clay in the colour you would like to use. For this flower I used the Magenta. Work the clay between your palms until it is soft enough to manipulate. Flatten onto your non stick craft mat. The layer should not be more than 1.5mm. Use your die cutter to cut out the 5 pieces as shown above
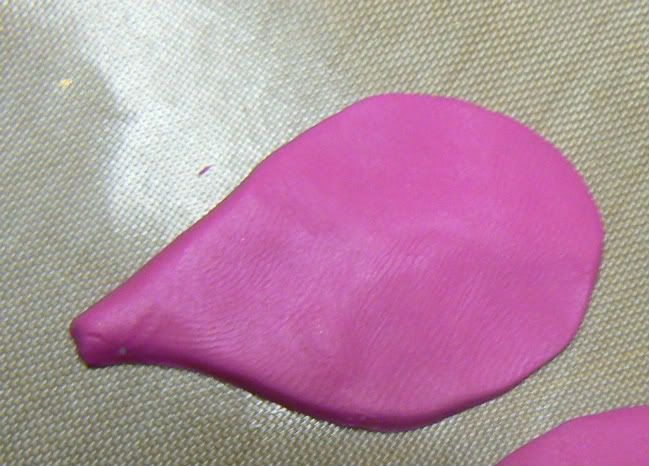
Step Two: Gently flatten the edges of all the petals. This is to soften the edges and will give your finished flower a more life-like appearance.

Step Three: Using a toothpick draw veins on each of your petals. There are petal veiners available at the baking supply store but unfortunately I do not have any so I improvised with a toothpick.
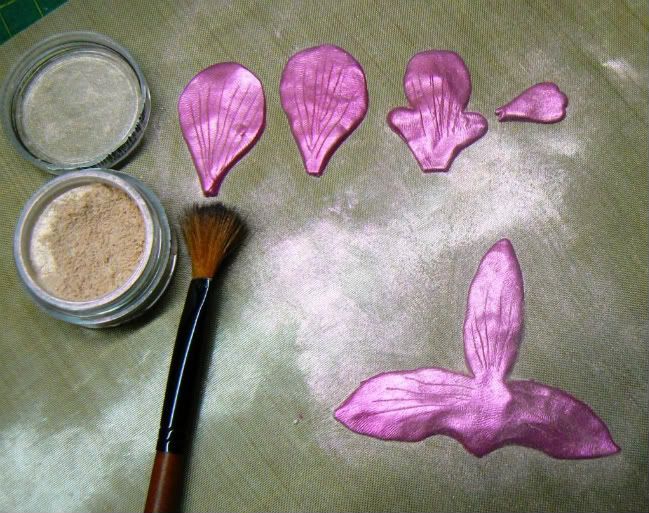
Step Four: Using a dust brush, apply a generous coat of Perfect Pearls powder over all 5 of your pieces. I used the colour blush to soften the brightness of the magenta clay.
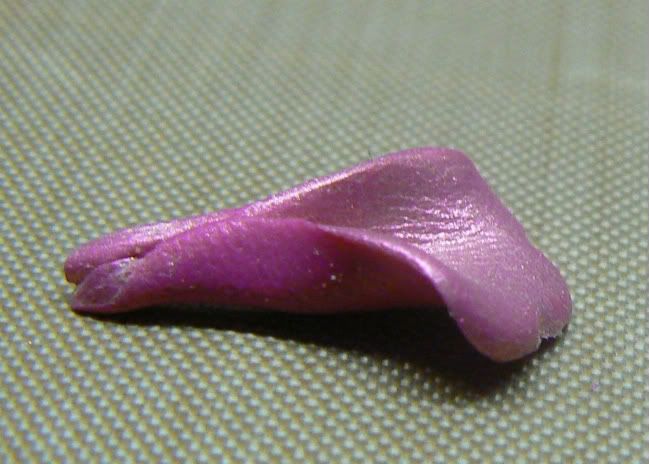
Step Five: Take the smallest piece and curl in as shown above to form the lobe of your orchid

Step Six: Now add the labella as shown above. Gently curl it back and press the edges between your fingers until they become wavy.

Step Seven: Add the two lateral petals. Press the clay at the base so it molds together with the base of the lobe and labella. Use your finger to support the petals. Again pinch the edges of the petals until they become wavy.

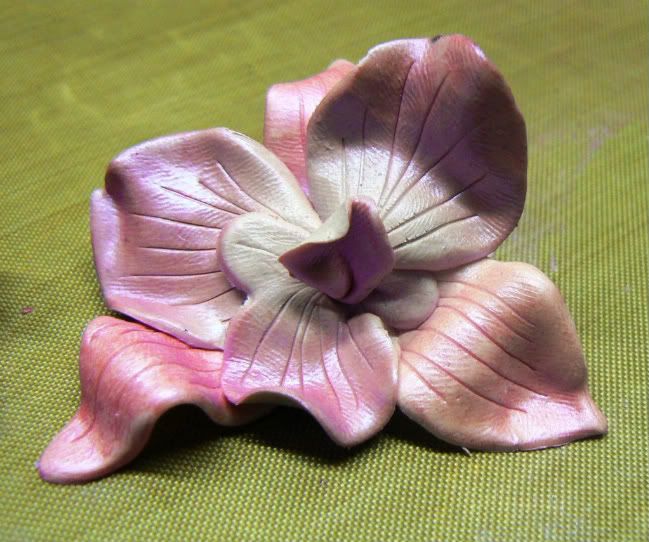
Step Eight: Add the last set of petals by wrapping them around from the base. Press the clay once again so the base is all molded together. Re-arrange your petals so they fall correctly. Pinch the edges so they are wavey to add to the life-like appearance. Place your flower back onto the non-stick craft mat and arrange it as you would like it to look on your project
Important note: Polymer clay harden once baked so you will not be able to manipulate your flower once it has been baked. Make sure it looks as you need it to before placing it in the oven.

Step Nine: To demonstrate what the Perfect Pearls looks like on white clay I made a second flower for my project. I used the Berry Twist for this flower. I only added the Perfect Pearls to the ends of the petals for a 2 tones flower.
Step Ten: I went through all the above steps again to create the finished flower which I placed on my craft mat and manipulated to look as I wanted it to look on my project.

Step Eleven: Leaving your flowers on your Ranger non-stick craft mat place them into your pre-heated oven at 230 degree Fahrenheit or 110 degree Celsius for 30 minutes

Step Twelve: While your flowers are baking you can use the time to make the leaves. You can of course wait to bake the flowers until the leaves are done. I do not have a long leaf die so I improvised and used one of the petals to cut my leaves out of some leafy green clay. I wasn't sure how many I'd want to add to my finished project to I cut six just to be safe.

Step Thirteen: using a toothpick, vein your leaves. Lightly press the edges of the leaves and generously dust them some green patina Perfect Pearls.
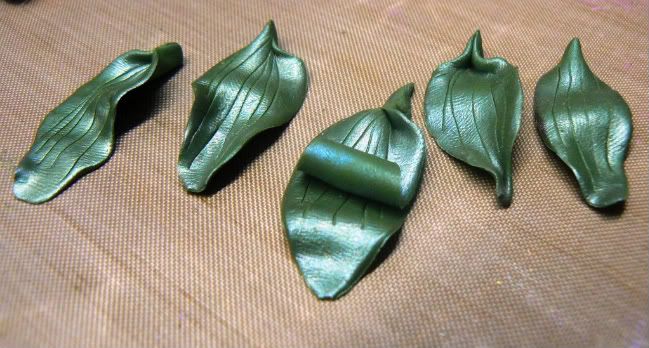
Step Fourteen: Manipulate your leaves as you would like them to look. Pinch the edges between two fingers to create the wavy look. Place them on your non-stick craft mat and place in the oven to bake for 30 minutes as you did with the flowers.
Once you have baked both your flowers and leaves and they have cooled add them to your projects with some hot glue.
The list of possibilities for what you can create with polymer clay is endless. Visit your local baking supply store to find some molds and die cutters. Perfect Pearls are guaranteed to give you a smooth finish every time and is definitely my go-to clour medium when using clay.
If you don't want to make an entire flower for your project, then invest in some leaf cutters or molds which you can use to make some life-like leaves to add to your paper or fabric blooms. These will add a lovely classic touch to your project.
ok, I SOOO need to try this! wonderful tutorial Wendy!
ReplyDeleteHeart stopping beautiful. oh wow, oh WOW. I want one but I don't want to make it because it won't turn out like this. I'd better stick to paper, LOL
ReplyDeleteAbsolutely gorgeous my friend! Great tutorial. :)
ReplyDeleteWow... these are gorgeous Wendy!! And your tutorial is sooooo easy to understand... you're an awesome teacher!!! Hugs... Tracy
ReplyDeleteHi WendyG,
ReplyDeleteIt's really very awesome !!!!
Merlen Hogg
skumming isolering
formethis is the best tutorial i saw until today ,is amazing, beatiful. thanks a lot.
ReplyDelete