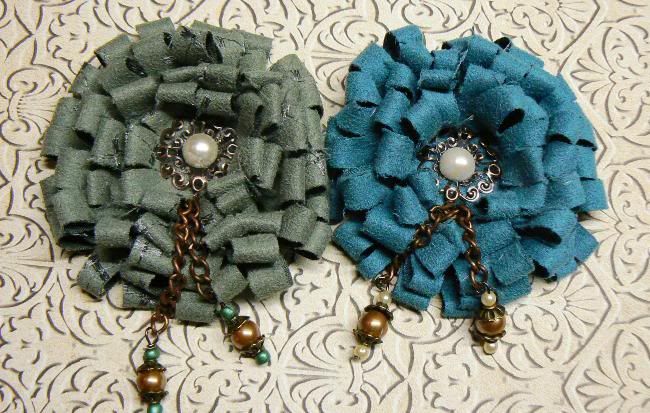
I personally love making my own flowers. When I add a handmade flower to a layout I always feel as though I've attached a small piece of my soul. Big name brand store bought flowers are always a great inspiration. I never try and duplicate them exactly because I know I'd be horribly dissapointed so instead I take a flower style I like and find a way to add or change a little something to it to make it my own. This is what I did for my flowers using the Prima Dechire collection as my inspiration.
Supplies
1.5" circle cardstock
Fabric cut 2"x 18"
Flower center
Hot glue gun or Fabritac adhesive
Note: The fabric you choose to use will determine the style of the finished flower. For my example, I used some suede fabric which has a very grungy distressed finished look but if you use some soft chiffon or taffeta for example, the style of the finished flower would be a lot more feminine.

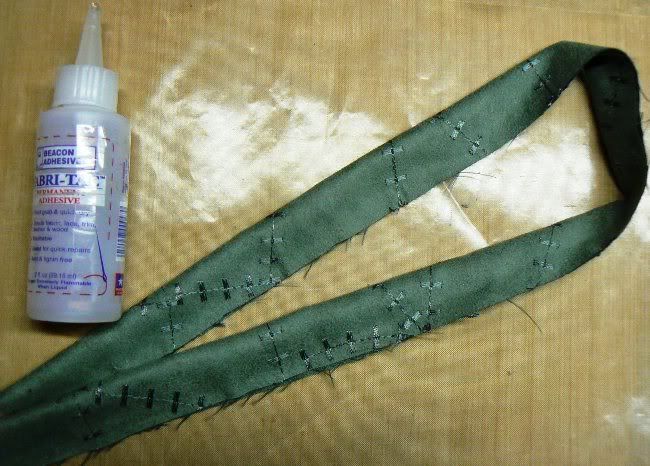
Step One: Fold you fabric in half length-wise and glue the two edges together with some fabrictac glue.

Step Two: Using a sharp pair of scissors, cut the fabric into fringed strips as shown above. Make your cuts about 2/3" deep and 1/5" wide. Do this for the entire length of the fabric.

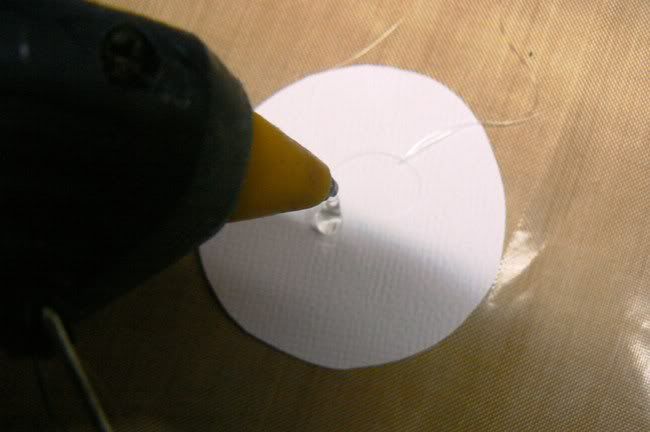
Step Three: Take your 1.5" cardstock circle and add some glue to the center. I used my hot glue gun for this part of the tutorial but Fabritac will work just as well.

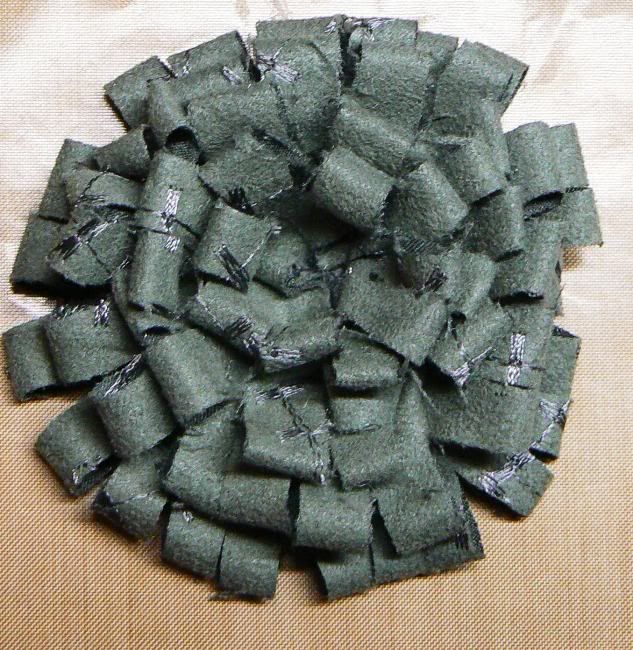
Step Four: Starting from the center, attach the fringed fabric strip to the cardstock in a spiral pattern. Pleat the fabric as you go to enable the circular pattern.

Step Five: Keep going until you get to the end of your fabric. The last piece should be folded and tucked neatly underneath the rim.

Step Six: I made my own flower center using a bronze and pearl center which I added a 2.5" metal chain I got at a discount store to. I then made some decorative pearls and added those to each end of the chain. A vintage button would also make a great center for these

Step Seven: Add your flower center to your grungy bloom allowing your metal chains to hang down from the center.
As mentioned, the style of these blooms can be altered from grungy to something much more femanine looking by the fabric you select. You can also try these using 2 layers of fabric for a two tone bloom.

oh, this is a great tutorial Wendy! Saving it into my favs and planning on making it soon! Thanks for sharing!
ReplyDelete~Amy
Very very pretty. I too love to make fabric flowers. Seems like I get on a roll, make several and then quit for awhile, but have lots and lots of fabric to play with, Im gonna have to try these, thanks for sharing.
ReplyDeleteI LOVE these flowers! I have to admit that I love making my own flowers as well. I'll be adding this technique to my list. Visit my blog (and 'Follow' if you like) to see the rolled fabric flowers I've been making. Thank you so much for sharing your flowers.
ReplyDeletePURE GENIUS!!! I can't wait to make these!!
ReplyDeletegreat minds think alike... I was just thinking up how to doop similar flowers - great tutorial my dear!!!
ReplyDelete