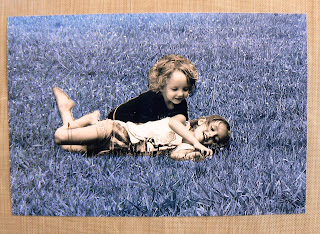
Supplies
Black & white AND sepia copy of the same photo
Sharp scissors for fussy cutting
Step One: Have the same photograph printed in black & white and sepia. Pictures that have a large background area with a definite focal point work best with this technique. The picture I selected is of my youngest two kids playing on the grass. You'll notice that the grass makes up the majority of the print with the kids being the obvious focal point.
Step Two: Using your fussy cutting scissors or a regular pair of sharp scissors, cut the focal point image out of the sepia photograph.
Step Three: Align the copy of the sepia focal point image over the black & white image so that they match up exactly. Make sure that none of the B&W focal point image is visible behind the sepia image before pasting down with your choice of adhesive.
It's that simple. Now you have an interesting and eye catching photograph to use on your layouts or craft project..
This is what the photo looks like on my finished layout
More details about this layout will be posted tomorrow.


I love this technique!!!!! I love all the things that can be done with photos...but I am a pretty simple gal... with NO SKILLZ! But this I CAN DO! Thanks for sharing Wendy!!!
ReplyDelete