Paint is one of my favourite colour mediums and I'm constantly looking for new and interesting ways to use it. Taking a lesson from some interior design techniques using masking tape and paint to create interesting patterns on walls, I thought I'd try scaling it down and apply the same technique to a layout background. I went into this blind not knowing what the end result would look like which added to the excitement of trying something new.
Supplies
Masking Tape
Several colours of acrylic paint
Gesso
Gesso brush
Pallet knife
Cardstock

Step One: Gather all your supplies together. Cover your entire piece of cardstock with a layer of acrylic gesso.
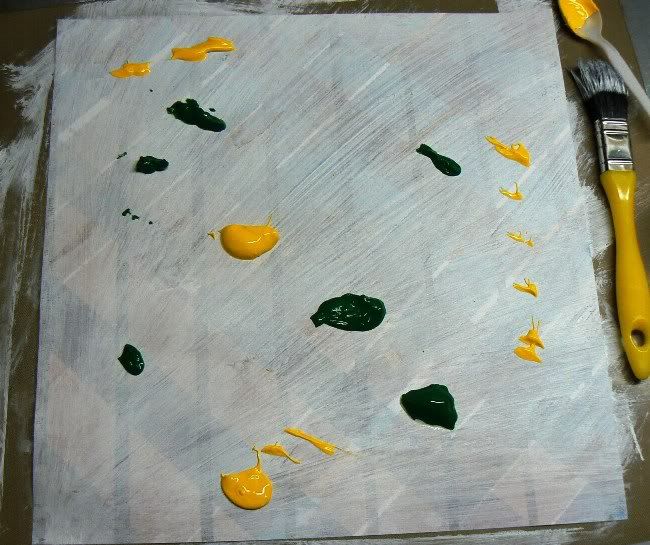
Step Two: Once the gesso is completely dry add several dollops of paint in two or three different colours to your surface.
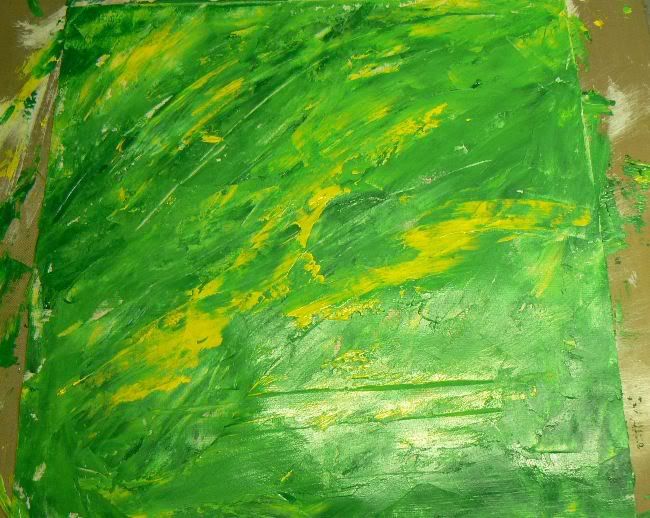
Step Three: Using your pallet knife spread the paint over the entire surface. Be sure to cover all the edges.

Step Four: Once the paint has dried add several strips of masking tape horizontally across the page evenly spaced.
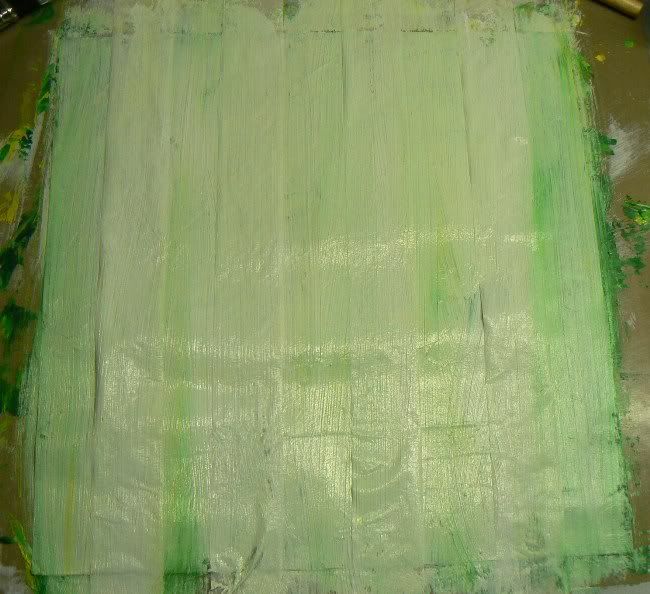
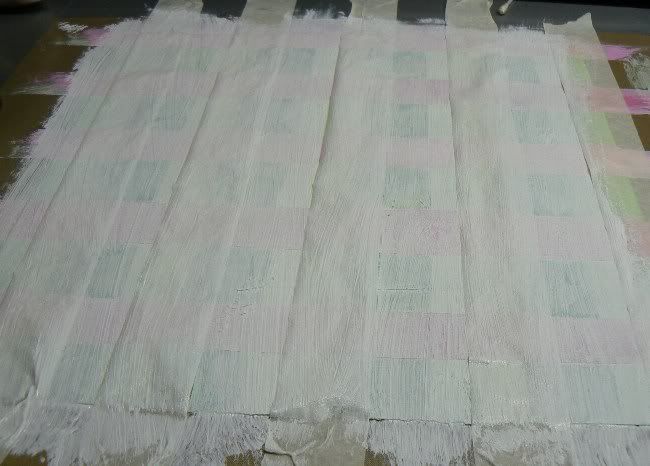
Step Five: Cover the entire surface with another layer of gesso. For this layer I added a small amount of green acrylic paint to the gesso to make a very light mint green.

Step Six: Once the gesso layer has dried, remove the strips of masking tape to reveal the first layer of paint underneath. Now you have a horizontal striped pattern.

Step Seven: For this layer place your masking tape strips vertically. Remember to leave even spaces between each strip of tape.
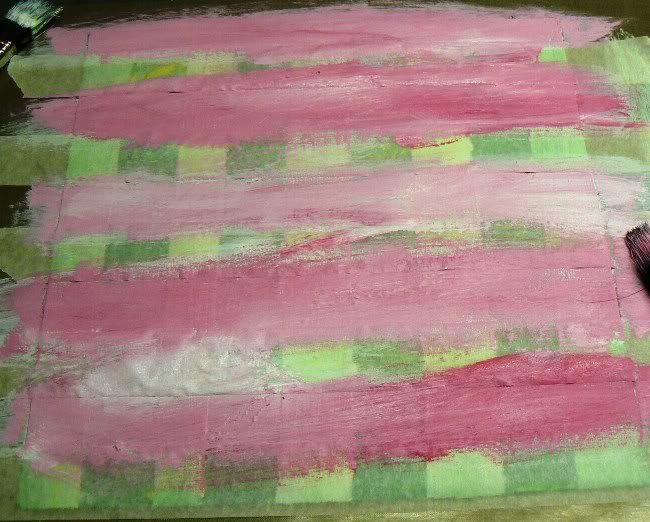
Step Eight: Paint the area between each strip of tape with a contrasting colour to the underlying layers.
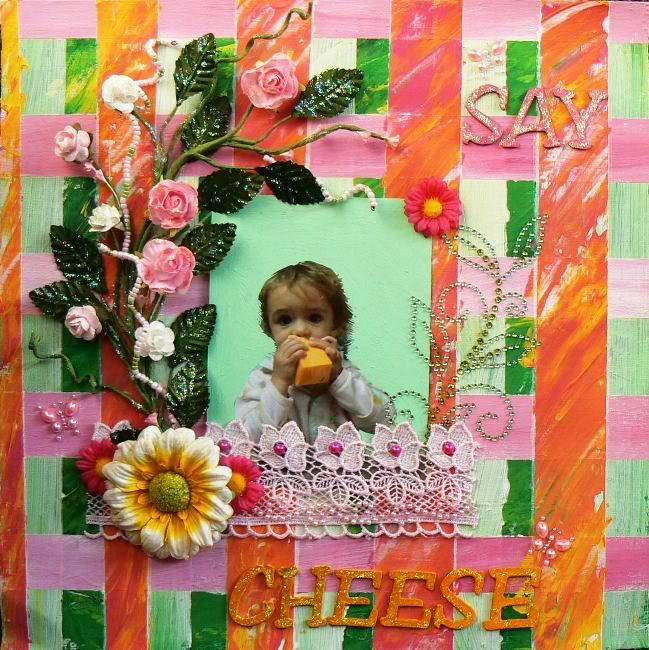
Tip: Use your photograph as a source of inspiration for your colour selections. The light pink for this layer as well as the mint green from the previous layer were both picked up from the fairy images on my daughter's pyjamas in the photo.

Step Nine: Once the paint is dry, remove the masking tape strips to now reveal a checked pattern.
Step Ten: Add more evenly spaced horizontal strips of masking tape. This time run the strips so that they overlap two of your previous layers. In my example I ran the masking tape strips so that it covered half of the mint green and half of the darker green. Once that's done, cover the entire surface with another layer of gesso.

Step Eleven: For your final layer you may want to use a brighter contrasting colour. I combined some fuchsia pink, orange and yellow for my example.

Step Twelve: For the last time, remove the strips of masking tape to reveal an interesting checked background.
I had a lot of fun with this technique and it taught me to broaden my horizons when looking for new techniques. Don't be a fraid to look beyond traditional scrapbooking resources for inspiration. If you see something that inspires you but you're not sure if you'll be able to interpret it well then try playing around with your idea on a tag or ATC. These are great projects to work on when experimenting.
Wendy girlfriend you are rocking my world! I can't wait to play with these projects
ReplyDelete