When you think of gesso I bet your first thought is that this must have something to do with mixed media and not scrapbooking. Well, you'd be wrong. Yes, gesso is a paint primer used by mixed media artists but there are so many great techniques that it can be adapted to for other crafters. Many of these techniques will be covered in upcoming issues so this is just a little something to wet your appetite and help you see that gesso should be a staple supply for both mixed media artists and scrapbookers alike. I used a tag in my example but this background technique can be applied to any craft project.

Gather your supplies together. Here's what you'll need.

Supplies
Gesso
Paint brush
Ranger distress inks.
Blending tool

Step One: Randomly paint a few stokes of gesso onto your tag or cardstock. For this step you'll just need a few stokes, leaving the majority of the paper surface uncovered.

Step Two: Using your blending tool, ink the background. This techniques works best when using several shades of the same colour blended together over layers. Start with the lightest shade first. I used weathered wood distress ink as my base colour.
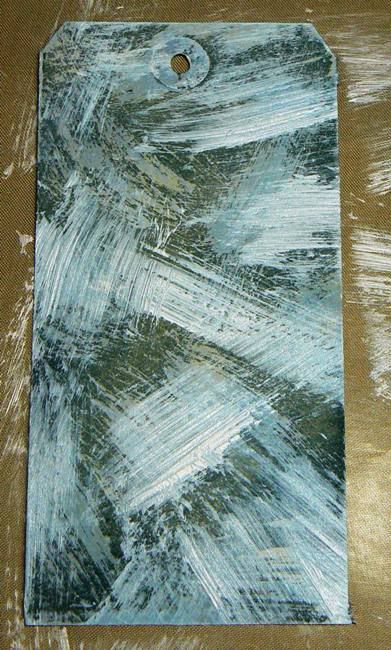
Step Three: Add a second layer of gesso in random strokes. You can overlap some of the first layer of gesso but again, leave patches of the background uncovered. Ink with a second shade of your chosen colour. I used Stormy Sky distress ink as my second colour.
Step Four: Follow the same process again with a third layer of gesso and a third shade of your chosen colour. I used Faded Jeans distress ink as my third and final colour.
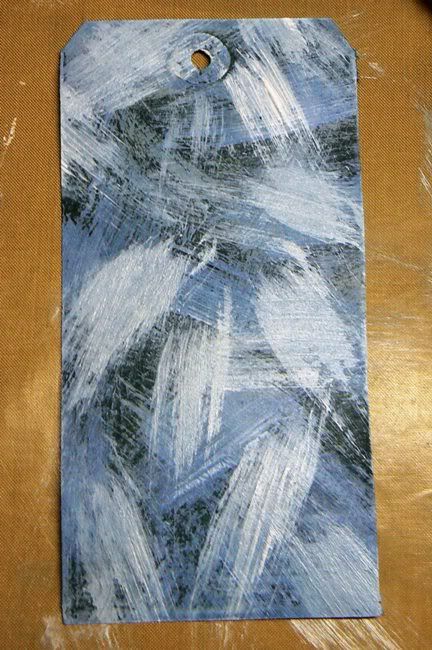
Step Five: Distress and ink the edges of your tag or layout background. I used black soot distress ink to add some depth to my edges.
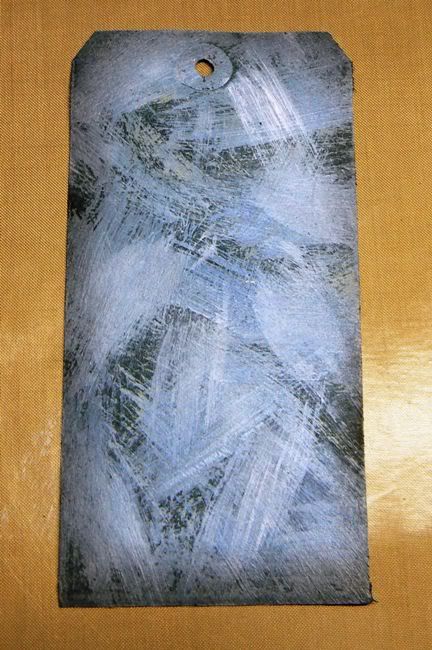
You can stamp over the background as I have done with my tag or you can leave it as is. Try using longer alternating horizontal and vertical strokes for a different finished look.
wow that is a pretty tag, thanks for sharing!
ReplyDeleteThat's lovely and a helpful tutorial. Tfs!
ReplyDeleteVery nice. I'll be trying this for sure.
ReplyDelete